







Calling an AI model takes a few lines of code. Putting one into production has traditionally meant GPU servers, containers, autoscaling, and infrastructure costs that keep running even when the feature is idle. Much of that work sits between an idea and something users can actually use.

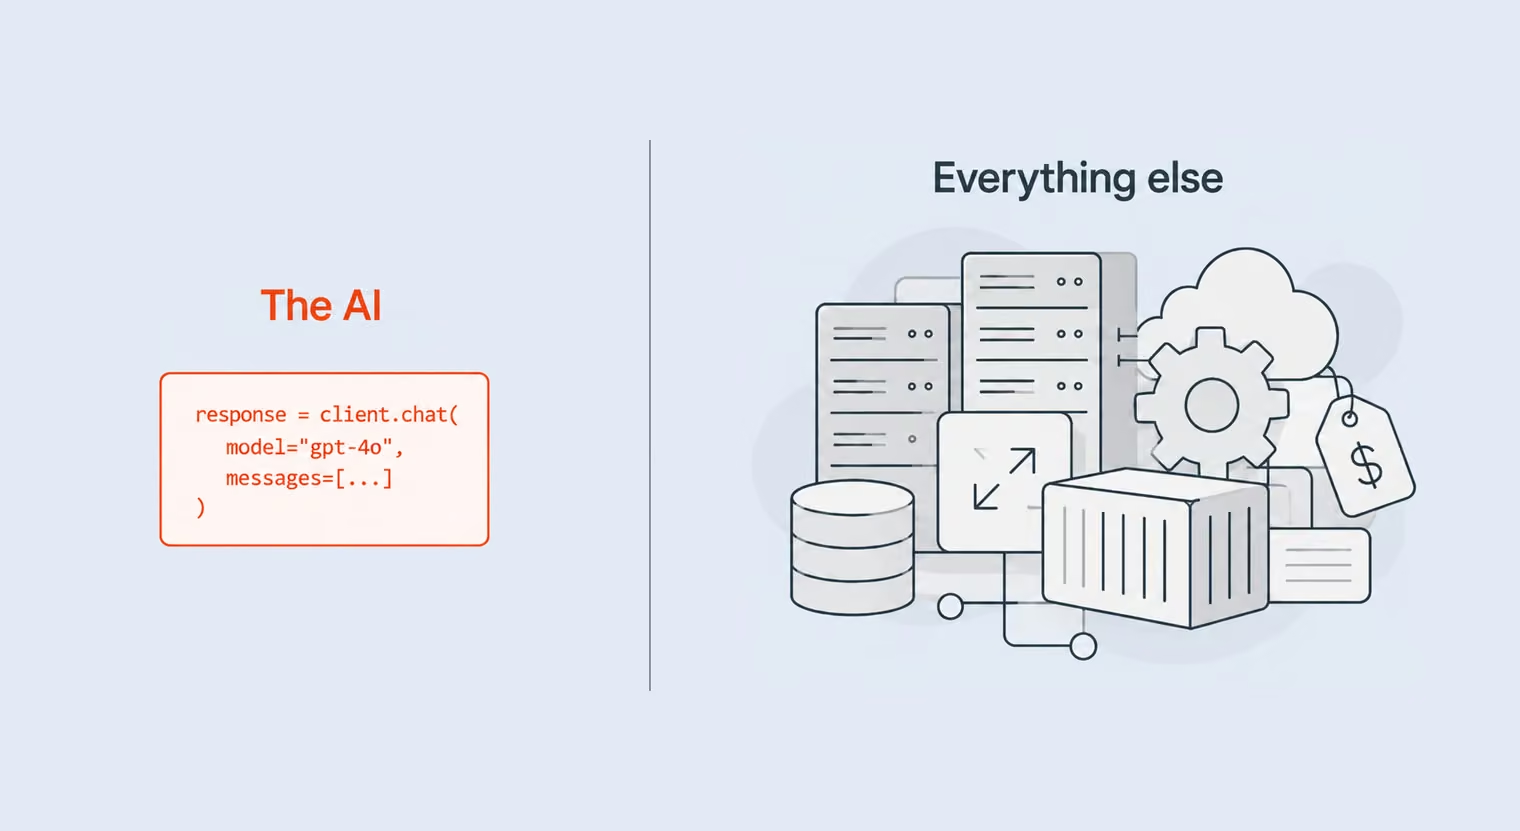
Workers AI removes much of that overhead. The models already run across Cloudflare’s edge network, so there’s no GPU infrastructure to provision or maintain. Your code sends a request, the model returns a response, and you pay for the inference that actually runs.
We’ll explore the Workers AI ecosystem first, then build an image SEO analyzer that turns an uploaded photo into seven fields for image SEO and accessibility. You’ll see how the model, bindings, parsing, deployment, and production controls fit together along the way.
{{banner}}
Workers AI is less a single product than a set of pieces that fit together — a model catalog, a vector database, a gateway to outside providers, and the storage and computation to tie them into an application. Before building anything, it’s worth seeing what each part does and where it fits, starting with the shift that makes the whole approach work.
The shift Workers AI makes is in who runs the infrastructure. Instead of bringing AI to servers you operate, you bring your code to Cloudflare’s edge, where the inference runs close to your users on hardware that’s already there. What that arrangement buys you is worth spelling out:
This matters most early on. You can prototype an AI feature, deploy it worldwide, and watch how real users respond — all before infrastructure is a question you have to answer. For a broader comparison of the two models, read our breakdown of server vs. serverless background tasks.
Workers AI provides more than fifty models, and the useful skill is recognizing which category solves the problem in front of you. Each one answers a different kind of question, so the choice starts with what you’re trying to do.
Reach for a text model whenever the application reads, writes, or reasons about language: chatbots, content generation, code assistance, summarization, translation, or question-answering. The catalog runs from fast to powerful, and the tiers sort roughly by how much capability you need:
A few specialized variants are worth knowing:
As a rough guide: 1–8B models for speed on simple tasks, 8–24B for the balance a production chatbot needs, 32–70B when accuracy is critical, and Qwen Coder specifically for code. If you’re new to how these models work, start with our overview of how LLMs work and how to use them.
Vision models read the content of an image — understanding context, answering questions, and describing a scene in natural language. Llama 3.2 11B Vision Instruct, the model Part 2 is built on, handles a range of tasks:
The distinction from object detection matters: where a detection model returns bounding boxes and labels, a vision model returns language. That’s what makes it useful across:
To create images from text, Workers AI offers the FLUX family from Black Forest Labs, the team behind Stable Diffusion:
The uses follow the capability: social graphics from a brief, concept art and rapid variations, product mockups in different settings, and per-user dynamic visuals.
Whisper handles speech-to-text across many languages, and trained on 680,000 hours of audio, it holds up against accents, background noise, and technical terminology — useful for transcription, in-app voice commands, meeting notes, and accessibility.
MeloTTS goes the other direction, turning text into natural-sounding speech in multiple languages for voice assistants, audiobook generation, and accessibility features.
Between Whisper and MeloTTS, an application can both hear and speak.
Embeddings convert text — or images, or audio — into arrays of numbers that capture meaning mathematically. Similar content produces similar vectors, which is what enables semantic search: finding by meaning rather than by exact keyword. For English text embeddings, Workers AI offers BGE models from BAAI in three sizes:
EmbeddingGemma from Google covers 100+ languages.
The value shows in a concrete search. Look for “affordable Italian restaurants,” and keyword matching finds only pages with those exact words, while semantic search also surfaces “budget-friendly pasta places,” “cheap trattorias,” and “inexpensive pizza joints,” because the embeddings read them as the same meaning. That’s what powers:
Every business has its own domain language. A medical company needs a model that understands clinical terminology, a legal firm one trained on case law, an e-commerce brand one that writes in its house voice. The base models are general by design, so getting that specificity means adapting one.
LoRA — Low-Rank Adaptation — is how you do that without training from scratch. Instead of modifying a model’s billions of parameters, you train a small adapter of a few million parameters that sits on top of a base model like Llama or Mistral.
The economics are the whole point: LoRA adapters are much cheaper and faster to train than a full model because they update only a small set of parameters rather than the entire base model. You can build dozens of specialized variants, swap them by context, and store them alongside the one shared base model.
A few practical constraints define what you can upload:
The uses are wherever domain-specific language pays off:
Vectorize is Cloudflare’s distributed vector database, built specifically for storing and querying embeddings at global scale. It’s where the vectors an embedding model produces actually live, and where a semantic search runs.
The difference it makes is clearest against the traditional approach. A keyword search indexes every document, matches on exact terms, and ranks by relevance — which means synonyms don’t match, phrases have to appear as written, and nothing understands meaning. Vectorize works on meaning instead, and the flow runs in five steps:
The payoff is that a search for “how to deploy” also surfaces documents about “publishing,” “going live,” and “launching,” because the embeddings recognize them as related. The architecture behind it is a simple loop, the same model used on both sides:
Content → Workers AI (embedding model) → Vectorize (store vectors)
Query → Workers AI (same model) → Vectorize (find similar) → Results
That pattern supports a range of applications:
Not every model lives in Workers AI. Sometimes a job calls for GPT-4’s reasoning, Claude’s long context, or Gemini’s multimodal handling — and AI Gateway routes to any of them through a single Cloudflare endpoint, so external providers sit behind the same front door as the built-in catalog. The supported list is broad:
Routing through Cloudflare rather than calling each provider directly buys several things at once:
The feature that ties it together is an OpenAI-compatible endpoint. You write the code once with OpenAI’s SDK, then switch providers by changing a single parameter:
import OpenAI from 'openai';

const client = new OpenAI({
  baseURL: 'https://gateway.ai.cloudflare.com/v1/{account}/{gateway}/compat'
});

// Use OpenAI
await client.chat.completions.create({
  model: 'openai/gpt-4',
  messages: [...]
});

// Same code, different model
await client.chat.completions.create({
  model: 'anthropic/claude-3-opus-20240229',
  messages: [...]
});
Swapping the model identifier is the whole change without SDK swap or refactoring.
Workers AI offers four integration modes, and which one fits depends on where your code runs and how much control you need. Each of the four suits a different situation:
The simplest approach for anything running on Cloudflare Workers:
// Inside a Worker
const result = await env.AI.run('@cf/meta/llama-3.2-11b-vision-instruct', {
  messages: [
    { role: 'user', content: 'Describe this image' }
  ]
});
This is the one to reach for in a Workers app: low latency, clean code, and no authentication to wire up.
For calling Workers AI from anything that isn’t a Worker:
curl https://api.cloudflare.com/client/v4/accounts/{account_id}/ai/run/{model} \
  -H "Authorization: Bearer {api_token}" \
  -H "Content-Type: application/json" \
  -d '{"messages": [{"role": "user", "content": "Hello"}]}'
It’s language-agnostic and works from anywhere, which makes it the choice for external services, non-Workers applications, and quick testing.
Adds observability and control without changing the shape of your code:
// Configure gateway in wrangler.jsonc first
const result = await env.AI
  .gateway('my-gateway')
  .run('@cf/meta/llama-3.2-11b-vision-instruct', {
    messages: [...]
  });
You get the same simple API as direct binding, plus caching, logs, and rate limiting — which is what a production Workers app usually wants. It’s configured in wrangler.jsonc:
{
  "ai": {
    "binding": "AI",
    "gateway": {
      "id": "my-gateway",
      "cache_ttl": 3600,
      "skip_cache": false
    }
  }
}
Full control over routing and configuration over HTTP:
const response = await fetch(
  `https://gateway.ai.cloudflare.com/v1/{account}/{gateway}/workers-ai/{model}`,
  {
    method: 'POST',
    headers: { 'Authorization': `Bearer ${token}` },
    body: JSON.stringify({ messages: [...] })
  }
);
This works outside Workers and gives full control over each request, for complex routing logic or external apps that still want Gateway features.
Put simply, the choice comes down to where you’re running and what you need: direct binding to build on Workers, the Gateway binding when you need observability, the REST API for an external application, and the Gateway REST API for complex routing. For the image analyzer in Part 2, direct binding is the right call — simplest and fastest.
Workers AI is one piece of Cloudflare’s developer platform, built to sit alongside storage, databases, and edge logic in a full application — and most real uses combine it with the other pieces rather than calling a model in isolation. A few architecture patterns show how those pieces fit. We walked through a complete example in our guide to building a full-stack app with Cloudflare.
The clearest way to see the platform work is through the flows a real feature follows. Each pattern below chains Workers AI with storage and data services to do something a model alone couldn’t.
An AI-enhanced storage flow runs an upload through analysis and indexing:
User uploads image → R2 (store original)
→ Workers AI Vision (analyze)
→ D1 (store metadata)
→ Vectorize (store embedding for search)
That’s the shape of a photo-management app with AI-powered search and organization.
A real-time RAG flow answers a question from your own documents:
User question → Workers AI (embed query)
→ Vectorize (find relevant docs)
→ D1 (fetch full content)
→ Workers AI (generate answer with context)
That’s a support chatbot citing company documentation.
A content pipeline runs generation and storage off a trigger:
Webhook trigger → Workers AI (generate content)
→ D1 (store draft)
→ R2 (store assets)
→ KV (cache frequently accessed)
That’s automated content generation for marketing campaigns.
Each service in those flows does one job, and knowing what each is for makes the patterns above read at a glance:
Workers AI meters usage in neurons, with the exact consumption depending on the model and workload. The free allocation includes 10,000 neurons per day; usage above that on Workers Paid is billed at $0.011 per 1,000 neurons. Cloudflare also publishes model-specific pricing in tokens, image tiles, audio minutes, and other units depending on the model.
A useful starting point is to avoid using more model capacity than the task needs:
Part 1 covered the pieces. Now we’ll put them together in a working application and see the decisions that only become visible once you start building.
The project is an image SEO analyzer: upload an image, and it returns seven fields for image SEO and accessibility. It’s a practical example of how a vision model can turn an uploaded image into structured, usable output.
The analyzer is designed to return seven fields:
You can try the finished version on the live demo before building it.
The model doing the work is Llama 3.2 11B Vision, chosen because it reads image context and produces structured text — which is exactly what SEO metadata needs. It describes not just an object (“cat”) but a scene (“Siamese cat sitting upright on a white background, looking at the camera”), and that specificity gives the generated metadata more useful context. The stack around it is deliberately small:
Before writing any code, a few things need to be in place, and one of them is specific to the vision model this project uses. Getting both sorted up front means the build itself runs without interruption.
You’ll need:
One licensing detail matters before you start. Llama 3.2 Vision requires a one-time license acceptance with Meta — most Workers AI models don’t, so this is specific to this model. The setup steps below handle it.
The backend is a single Cloudflare Worker that takes an image, sends it to the vision model, and returns the seven metadata fields. It comes together in a handful of steps, from scaffolding the project to writing the request handler.
Scaffold a new Workers project from the Cloudflare CLI:
npm create cloudflare@latest cloudflare-workers-ai-apiWhen prompted, select:
This scaffolds a modern Workers project with TypeScript and the current Wrangler configuration.
Open wrangler.jsonc and add the AI binding:
{
  "name": "cloudflare-workers-ai-api",
  "main": "src/index.ts",
  "compatibility_date": "2026-03-10",
  "ai": {
    "binding": "AI"
  }
}
The ai binding exposes Workers AI models through env.AI in your code.
Log in to Cloudflare so Wrangler can deploy on your behalf:
npx wrangler loginThis opens your browser for OAuth authentication, which is cleaner than managing API tokens locally.
This step applies only to Llama 3.2 Vision models and is run once per account. First, set your credentials from the Cloudflare dashboard:
# Get credentials from Cloudflare Dashboard
export CLOUDFLARE_ACCOUNT_ID="your-account-id"
export CLOUDFLARE_API_TOKEN="your-api-token"
Then send the acceptance request to Meta’s license endpoint:
# Accept Meta's license
curl https://api.cloudflare.com/client/v4/accounts/$CLOUDFLARE_ACCOUNT_ID/ai/run/@cf/meta/llama-3.2-11b-vision-instruct \
  -X POST \
  -H "Authorization: Bearer $CLOUDFLARE_API_TOKEN" \
  -H "Content-Type: application/json" \
  -d '{ "prompt": "agree" }'
A "success": true response confirms the license was accepted. If the account has already accepted it, the API may return error code 5016.
The backend is split across five focused files rather than one monolith. The reasons are worth stating before the code, because they shape how the rest of the build reads: each file has a single job, so routing logic never tangles with model invocation and parsing stays separate from CORS configuration. The AI module can be tested on its own or reused in another Worker, and the whole thing still makes sense when you return to it months later.
The structure is straightforward:
src/
├── index.ts # HTTP routing and request validation
├── ai.ts # AI model invocation and response handling
├── cors.ts # CORS configuration for frontend access
├── helpers.ts # Parsing and data transformation
└── prompt.ts # AI prompt engineering
Cross-Origin Resource Sharing is what lets the frontend on GitHub Pages call the API on the Workers domain — without the right CORS headers, the browser blocks the request before it reaches your code:
export const corsHeaders = {
  'Access-Control-Allow-Origin': '*',
  'Access-Control-Allow-Methods': 'POST, OPTIONS',
  'Access-Control-Allow-Headers': 'Content-Type',
} as const;

export function handlePreflight(): Response {
  return new Response(null, { headers: corsHeaders });
}
The OPTIONS handler matters more than it looks. When a request carries Content-Type: application/json, the browser first sends a preflight OPTIONS request to check CORS permissions, and without a handler for it, the request fails before your actual logic ever runs.
The quality of the output depends heavily on the prompt, and this one has two parts: a role definition that sets the model’s expertise, and a strictly formatted output instruction:
export const ROLE_PROMPT = `You are an SEO content specialist with expertise in image optimization for Google Search and Google Images. You understand search intent, keyword strategy, and accessibility best practices.`;

export const USER_PROMPT = `Analyze this image and respond with EXACTLY these 6 lines, no markdown, no bold, no extra text:

DESCRIPTION: [2-3 sentence detailed description of the image content]
ALT: [SEO-optimized alt text under 125 characters]
TAGS: [tag1, tag2, tag3, tag4, tag5]
KEYWORD: [single most important focus keyword for this image]
FILENAME: [seo-friendly-filename-without-extension, use hyphens]
TITLE: [img title attribute under 60 characters]

Remember: Use EXACTLY this format with colons. No extra lines.`;
The two prompts do different jobs. The role prompt sets context — asking for SEO expertise rather than a generic image description shapes how the model selects keywords and phrases the output.
The user prompt enforces structure: “EXACTLY these 6 lines” stops the model from adding preambles or explanations, and the specific constraints (“use hyphens,” “under 125 characters”) make the output meet SEO requirements directly.
Turning the model’s text output into structured JSON needs parsing robust enough to handle small variations in how the model responds:
export function normalizeImageUrl(image: string): string {
  return image.startsWith('data:')
    ? image
    : `data:image/jpeg;base64,${image}`;
}

export interface ParsedResponse {
  description: string;
  altText: string;
  tags: string[];
  focusKeyword: string;
  fileName: string;
  title: string;
}

export function parseAiResponse(text: string): ParsedResponse {
  const match = (pattern: RegExp) =>
    text.match(pattern)?.[1]?.trim() || '';

  return {
    description: match(/DESCRIPTION:\s*(.+?)(?=ALT:|TAGS:|KEYWORD:|FILENAME:|TITLE:|$)/s)
      || text,
    altText: match(/ALT:\s*(.+?)(?=TAGS:|KEYWORD:|FILENAME:|TITLE:|$)/s)
      || text.substring(0, 125),
    tags: match(/TAGS:\s*(.+?)(?=KEYWORD:|FILENAME:|TITLE:|$)/s)
      .split(',')
      .map(t => t.trim())
      .filter(Boolean),
    focusKeyword: match(/KEYWORD:\s*(.+?)(?=FILENAME:|TITLE:|$)/s),
    fileName: match(/FILENAME:\s*(.+?)(?=TITLE:|$)/s)
      ? `${match(/FILENAME:\s*(.+?)(?=TITLE:|$)/s)}.jpg`
      : '',
    title: match(/TITLE:\s*(.+?)$/s)
  };
}

export function buildSchema(parsed: ParsedResponse): object {
  return {
    '@context': 'https://schema.org',
    '@type': 'ImageObject',
    name: parsed.title,
    description: parsed.description,
    keywords: parsed.tags.join(', ')
  };
}
Two things carry the reliability here. The regex patterns use lookaheads to find each field while tolerating variation in spacing or ordering, and the fallbacks guarantee valid data even when the model’s format isn’t perfect.
The buildSchema function then produces JSON-LD that describes the image using Schema.org’s ImageObject vocabulary.
Workers AI supports structured output through response_format, or JSON mode, and that’s the recommended approach for text-based models. In practice, though, support varies by model. Text models like Llama 3.1 and 3.3 handle structured output reliably, but vision models like Llama 3.2 Vision may not consistently support strict JSON schemas and can produce unstable output when used with response_format.
There’s also a gap between documentation and behavior worth knowing about: a model can be listed as supporting JSON mode in the features docs while its parameter schema omits response_format, so the setting is silently ignored. Because of that, this implementation uses text output with controlled formatting and robust parsing, which buys consistent behavior across responses, compatibility with multimodal inputs, resilience to output variation, and no dependency on undocumented parameter support.
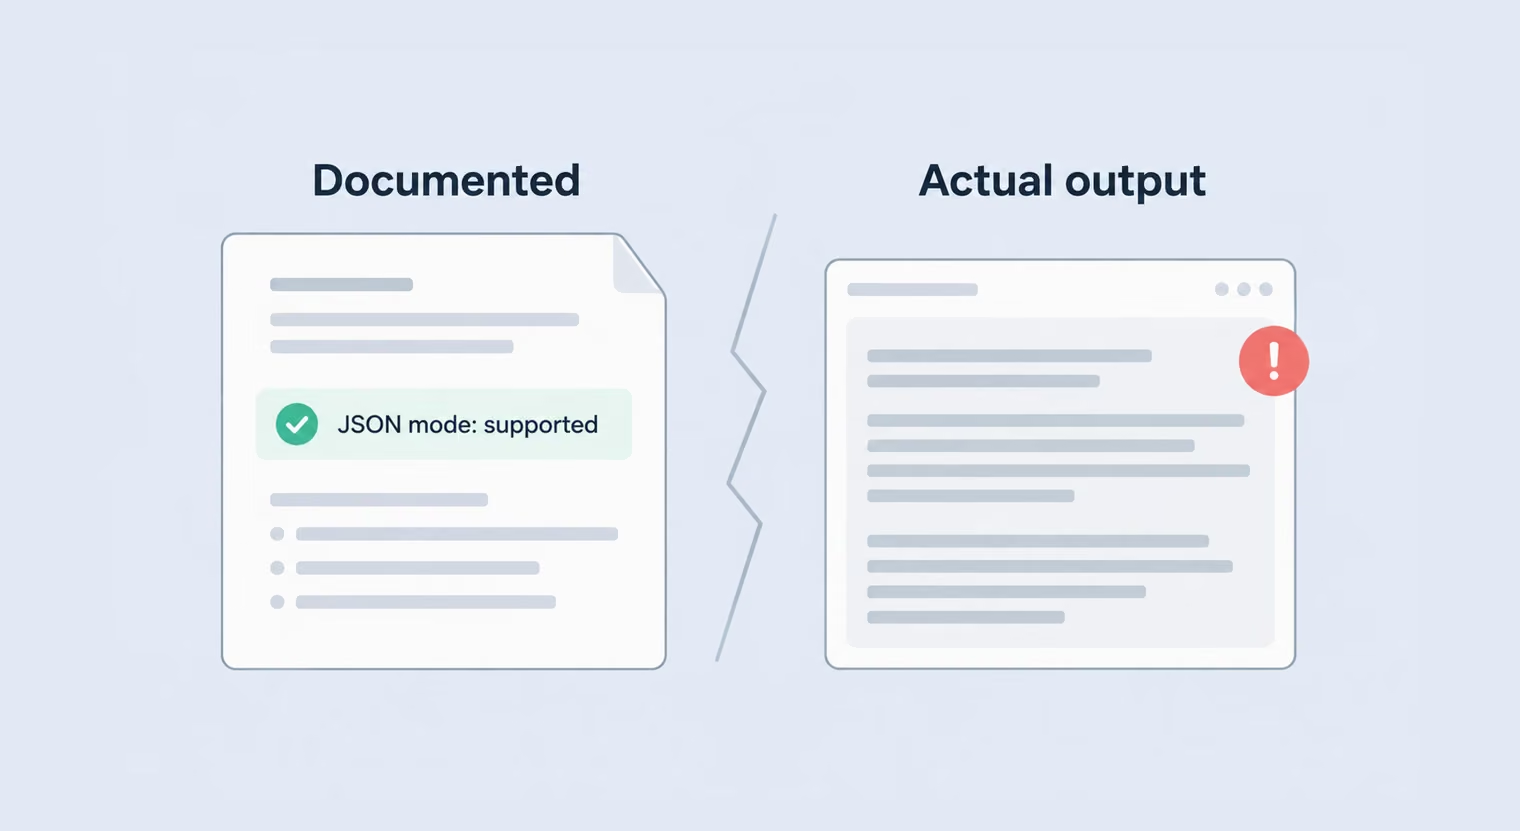
For a production system, a hybrid approach is the stronger choice: use JSON mode where it’s stable on text-only models, use text parsing for multimodal models, and keep fallback parsing in place even when JSON mode is on. That gives you both reliability now and forward compatibility as the platform changes.
The docs tell you what a model should do, and production teaches you what it actually does.
This module is where the request to Workers AI actually happens — assembling the prompt, sending the image, and shaping the response:
import { ROLE_PROMPT, USER_PROMPT } from './prompt';
import { parseAiResponse, buildSchema, ParsedResponse } from './helpers';

const MODEL = '@cf/meta/llama-3.2-11b-vision-instruct';

export interface AnalysisResult extends ParsedResponse {
  schema: object;
  model: string;
  timestamp: string;
}

export async function analyzeImage(
  ai: Ai,
  imageDataUrl: string
): Promise<AnalysisResult> {

  const response = await ai.run(MODEL, {
    messages: [
      {
        role: 'system',
        content: ROLE_PROMPT
      },
      {
        role: 'user',
        content: [
          {
            type: 'image_url',
            image_url: { url: imageDataUrl }
          },
          {
            type: 'text',
            text: USER_PROMPT
          }
        ]
      }
    ]
  });

  const parsed = parseAiResponse(response.response || '');

  return {
    ...parsed,
    schema: buildSchema(parsed),
    model: MODEL,
    timestamp: new Date().toISOString()
  };
}
Two details are worth noting. The 2026 Workers AI vision API uses the image_url structure inside content arrays, which mirrors OpenAI’s format and makes a later migration easier if you ever need one. And the return structure includes the model name and a timestamp — small additions that pay off when debugging or comparing output across model versions.
The main Worker ties the others together, handling routing, validation, and error responses:
import { corsHeaders, handlePreflight } from './cors';
import { analyzeImage } from './ai';
import { normalizeImageUrl } from './helpers';

export interface Env {
  AI: Ai;
}

export default {
  async fetch(request: Request, env: Env): Promise<Response> {

    if (request.method === 'OPTIONS') {
      return handlePreflight();
    }

    if (request.method !== 'POST') {
      return new Response(
        JSON.stringify({
          error: 'Method not allowed. Use POST.'
        }),
        {
          status: 405,
          headers: {
            ...corsHeaders,
            'Content-Type': 'application/json'
          }
        }
      );
    }

    try {
      const { image } = await request.json() as { image?: string };

      if (!image) {
        return new Response(
          JSON.stringify({
            error: 'Missing required field: image (base64 data URL)'
          }),
          {
            status: 400,
            headers: {
              ...corsHeaders,
              'Content-Type': 'application/json'
            }
          }
        );
      }

const imageDataUrl = normalizeImageUrl(image);
const result = await analyzeImage(env.AI, imageDataUrl);

return new Response(
  JSON.stringify({ success: true, ...result }),
  {
    status: 200,
    headers: {
      ...corsHeaders,
      'Content-Type': 'application/json'
    }
  }
);
} catch (error: any) {
  console.error('Error:', error);

  return new Response(
    JSON.stringify({
      error: 'Failed to analyze image',
      details: error.message
    }),
    {
      status: 500,
      headers: {
        ...corsHeaders,
        'Content-Type': 'application/json'
      }
    }
  );
}
The handler’s shape reflects two principles. Errors come back as structured JSON with appropriate status codes, and stack traces stay server-side in the logs rather than being exposed to clients. Validation happens early — checking for the required image field up front means a bad request fails fast with a clear message instead of proceeding with missing data.
With the five files in place, the backend is ready to run — first locally, then deployed to Cloudflare’s edge.
Start the local dev server:
npm run devThe Worker runs locally at http://localhost:8787, but Workers AI inference still runs remotely because there is no local AI model simulation. Those calls also count toward your Workers AI limits.
When it’s working locally, deploy:
npm run deployThe output shows your live URL:
Deployed: https://cloudflare-workers-ai-api.your-subdomain.workers.dev
The API is now live across Cloudflare’s edge network. You can test the deployed version with a direct request:
curl -X POST https://your-api-url.workers.dev \
  -H "Content-Type: application/json" \
  -d '{"image": "data:image/png;base64,iVBORw0..."}'
The backend is a working API, but it needs a face. The frontend is a single page in vanilla JavaScript — no framework — that handles the upload, shows the image while the model works, and lays out the several fields when they come back. It covers:
Put together, it looks like this — a single card that takes an image and returns the full set of metadata beneath it:
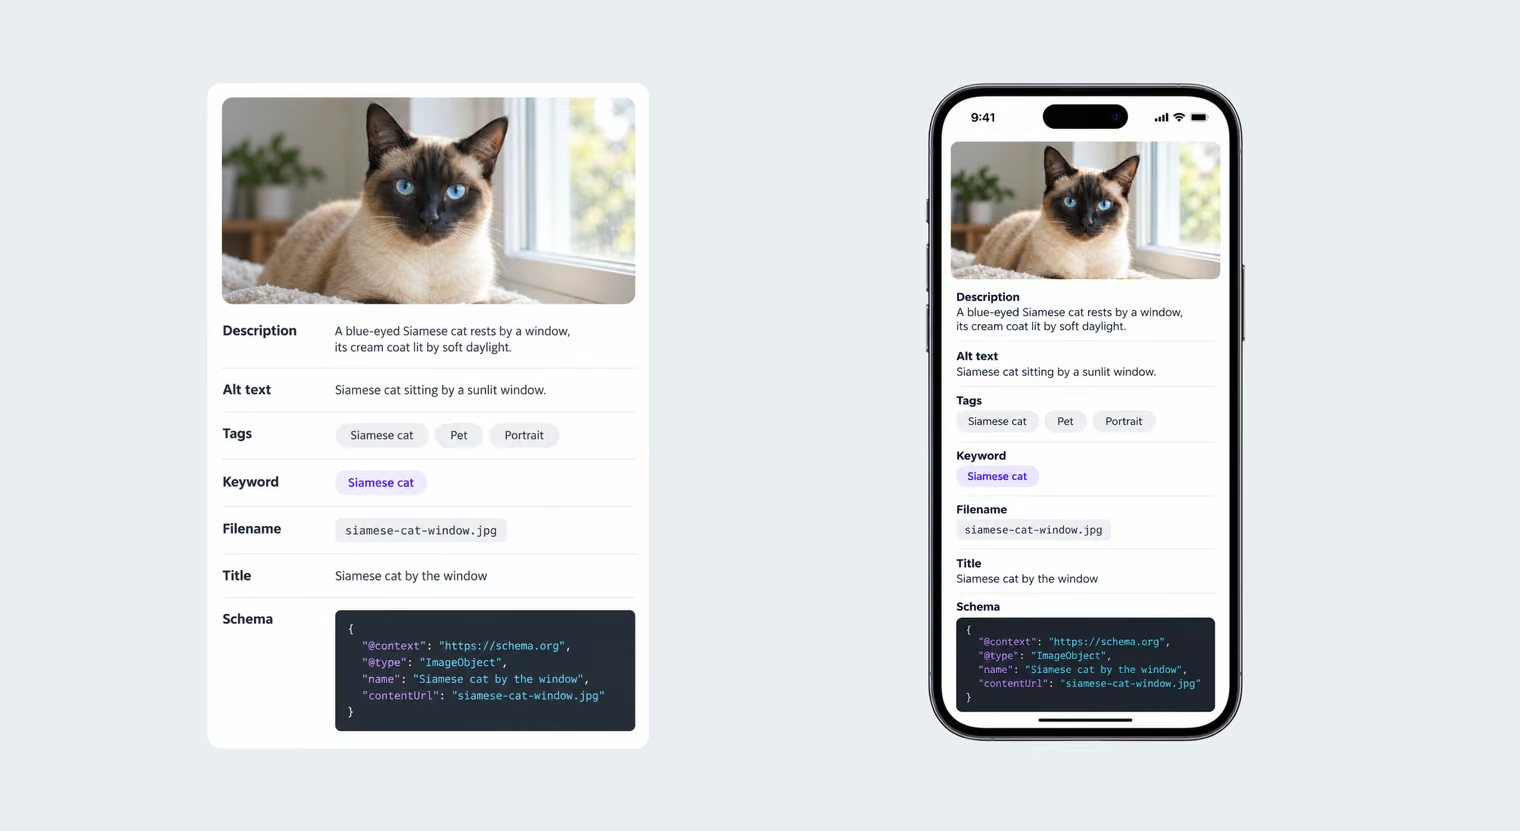
The interface stays deliberately simple, and the full implementation is available in the frontend GitHub repository.
With the frontend and backend connected, the tool works end-to-end. Uploading an image runs it through the whole pipeline and returns the seven fields in a few seconds — worth walking through with a real example to see what the model actually produces.
The interface starts clean, with an upload button and nothing else. After an upload, the image preview appears while the model analyzes in the background, typically in two or three seconds. Then the seven fields fill in. For a photo of a Siamese cat, the output looks like this:
The quality is in the specificity. The model reads the scene rather than just naming the object — “sitting upright and looking directly at the camera,” — and that context makes the generated metadata more descriptive than a simple object label.
The same tool fits several jobs:
Building the analyzer end to end covers a lot of ground that carries over to other projects — both concrete Workers AI skills and the wider patterns of building around a model:
What you’ve built is a foundation, and each part of the wider platform from Part 1 slots onto it cleanly. Four extensions are worth knowing, each adding one capability to the working analyzer.
Storing an embedding of each image’s description turns the analyzer into a semantic image search. It needs a Vectorize binding in wrangler.jsonc:
{
  "vectorize": [{
    "binding": "VECTORIZE",
    "index_name": "image-search"
  }]
}
With the binding in place, embed each description as it’s generated, store it, and query against it later:
// Generate embedding from description
const embedding = await env.AI.run('@cf/baai/bge-base-en-v1.5', {
  text: [result.description]
});

// Store in Vectorize
await env.VECTORIZE.upsert([{
  id: imageId,
  values: embedding.data[0],
  metadata: {
    description: result.description,
    tags: result.tags,
    url: imageUrl
  }
}]);

// Later: Search similar images
const queryEmbedding = await env.AI.run('@cf/baai/bge-base-en-v1.5', {
  text: ['sunset over mountains']
});

const similar = await env.VECTORIZE.query(queryEmbedding.data[0], {
  topK: 10
});
A user can then search “sunset over mountains” and find every semantically similar image, regardless of its filename or manual tags.
To keep the uploaded images themselves — for later analysis or comparison — add an R2 binding:
{
  "r2_buckets": [{
    "binding": "R2_BUCKET",
    "bucket_name": "images"
  }]
}
Then write each upload to the bucket, carrying the generated metadata alongside it:
const imageBuffer = await request.arrayBuffer();
const fileName = `images/${Date.now()}-${crypto.randomUUID()}.jpg`;

await env.R2_BUCKET.put(fileName, imageBuffer, {
  httpMetadata: {
    contentType: 'image/jpeg'
  },
  customMetadata: {
    description: result.description,
    tags: result.tags.join(',')
  }
});
Routing the model call through AI Gateway adds observability, caching, and failover. The binding approach is the one to prefer, with a REST option for external services:
// Option 1: Using Gateway Binding (Recommended)
const result = await env.AI
  .gateway('my-gateway')
  .run('@cf/meta/llama-3.2-11b-vision-instruct', {
    messages: [
      {
        role: 'system',
        content: ROLE_PROMPT
      },
      {
        role: 'user',
        content: [
          { type: 'image_url', image_url: { url: imageDataUrl } },
          { type: 'text', text: USER_PROMPT }
        ]
      }
    ]
  });

// Option 2: REST API (for external services)
const response = await fetch(
  `https://gateway.ai.cloudflare.com/v1/${accountId}/${gatewayId}/workers-ai/@cf/meta/llama-3.2-11b-vision-instruct`,
  {
    method: 'POST',
    headers: {
      'Authorization': `Bearer ${env.CF_API_TOKEN}`,
      'Content-Type': 'application/json'
    },
    body: JSON.stringify({ messages: [...] })
  }
);
The gateway is configured in wrangler.jsonc:
{
  "ai": {
    "binding": "AI",
    "gateway": {
      "id": "my-gateway",
      "cache_ttl": 3600
    }
  }
}
That brings request logs, cost tracking, automatic caching of duplicate requests, and rate limiting. The binding keeps the integration close to the existing Workers AI call while adding Gateway controls around it.
If you’re analyzing a specific kind of image — real estate, medical, fashion — a domain-specific LoRA adapter can improve the model’s output for that use case:
This can improve output quality for a specialized use case, potentially with a smaller and cheaper base model.
Taking the analyzer from a working build to something that holds up under real traffic comes down to four things: watching cost, capping abuse, tracking errors, and caching repeat work.
Neuron usage is visible in the Cloudflare dashboard. In this implementation, a typical image analysis used roughly 50 neurons during testing, putting the 10,000-neuron daily free allocation at around 200 similar runs. Actual usage varies with the request and output.
Rate limiting guards against abuse. Start by configuring a Rate Limiting binding in wrangler.jsonc:
{
  "ratelimits": [
    {
      "name": "RATE_LIMITER",
      "namespace_id": "1001",
      "simple": {
        "limit": 20,
        "period": 60
      }
    }
  ]
}
Then cap requests per client in the handler:
const limiter = env.RATE_LIMITER;

const identifier = request.headers.get('CF-Connecting-IP');

if (!identifier) {
  return new Response('Unable to identify client', { status: 400 });
}

const { success } = await limiter.limit({ key: identifier });

if (!success) {
  return new Response('Rate limit exceeded', { status: 429 });
}
In an authenticated application, use a stable user or API identifier as the rate-limit key. IP-based limiting can work as a simple fallback, but shared addresses may group unrelated users together.
For anything running in production, route errors to a tracking service — Sentry, LogFlare, or Cloudflare’s own analytics — with enough context to diagnose them:
catch (error) {
  console.error('Analysis failed:', {
    error: error.message,
    stack: error.stack,
    imageSize: imageDataUrl.length,
    timestamp: new Date().toISOString()
  });

  // Report to external service if needed
  await reportError(error);

  return errorResponse(500, 'Analysis failed');
}
If the same images get re-uploaded often, caching results by image hash avoids paying for the same analysis twice. It needs a KV binding:
{
  "kv_namespaces": [{
    "binding": "KV",
    "id": "your-kv-namespace-id"
  }]
}
Then hash each image, check the cache before calling the model, and store the result on a miss:
// Generate cache key from image hash
const imageHash = await crypto.subtle.digest(
  'SHA-256',
  new TextEncoder().encode(imageDataUrl)
);
const cacheKey = Array.from(new Uint8Array(imageHash))
  .map(b => b.toString(16).padStart(2, '0'))
  .join('');

// Check cache first
const cached = await env.KV.get(cacheKey, 'json');
if (cached) {
  return new Response(JSON.stringify(cached), {
    headers: { ...corsHeaders, 'Content-Type': 'application/json' }
  });
}

// Analyze and cache result
const result = await analyzeImage(env.AI, imageDataUrl);
await env.KV.put(cacheKey, JSON.stringify(result), {
  expirationTtl: 86400 // 24 hours
});
The complete backend source code is available on GitHub if you want to explore the implementation beyond the snippets in this guide.
The image analyzer is a small example, but it shows the larger pattern behind Workers AI: the model infrastructure is already in place, while the application logic, data services, and production safeguards stay in your hands. That makes it possible to move from an AI idea to a working feature with far less infrastructure setup than a traditional self-hosted approach.
The same pattern extends beyond image metadata. Choose the model that fits the task, add the platform services the feature needs, and layer in controls such as caching, monitoring, or rate limiting as usage grows. Workers AI doesn’t remove the application work, but it does remove much of the infrastructure you would otherwise have to manage yourself.
{{banner-2}}