AWS makes it easy to start small, scale up, and, if you’re favored enough, step onto the big stage. The number of your servers on this platform depends on the needs, but you might set out at three: App Runner, RDS, and ElastiCache. How can they simplify developers’ work and speed up the release of your site?

Just when everything seems to go smoothly and your team needs to concentrate on the application itself, developers often hit a wall. They have to spend a lot of time configuring servers, networks, and other infrastructural components. Whatever the obstacles, modern web projects still require fast and secure deployment. Today, we will examine how to launch our site quickly and safely using AWS tools such as App Runner, RDS, and ElastCache.
Overview of the website deployment toolkit
Before diving into the practical steps to deploy your site, you need to learn more about the tools we will be using. Let us clarify:
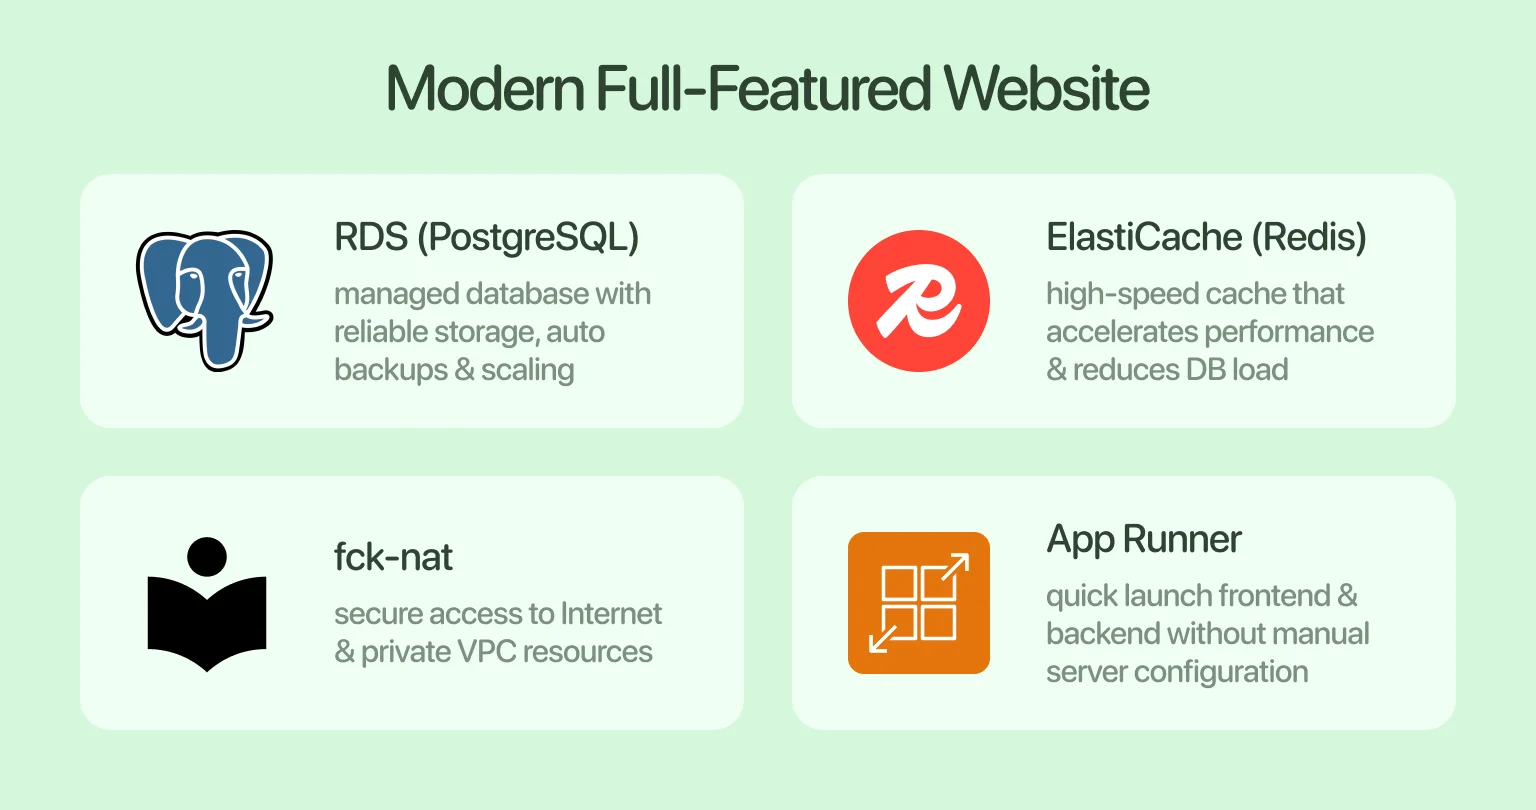
- App Runner: Allows quick launch of frontend and backend applications without manual configuration of servers or containers
- RDS (PostgreSQL): With this managed relational database, you receive reliable data storage, automatic backups, and scaling
- ElastiCache (Redis): It’s a high-speed cache that accelerates application performance and reduces database load
- fck-nat: Organizes secure access for App Runner both to the Internet and private resources within the VPC
Solution Architecture
The idea behind the fast deployment of your website is simple. Out of the four tools above, you begin with App Runner, as it handles both the frontend and the backend. Through fck-nat, your site gains secure access to the Internet. Meanwhile, internal resources, such as RDS and ElastiCache, remain in private subnets and are protected from external access. This solution is perfect — but “Why use these specific services?” you might ask.
The key advantages of the mentioned tools are as follows:
- App Runner instead of EC2 or ECS: With it, you can launch applications without dealing with server or container setup. This significantly simplifies life for developers, especially if a quick start and automatic scaling are needed
- RDS (PostgreSQL): Using it means automatic backups, scaling, and simple administration without manual configuration of database servers
- Redis (ElastiCache): Redis is ideal for caching, session storage, and organizing queues. It is a versatile tool that significantly accelerates application performance and reduces database load
Thus, this architecture speeds deployment and also eliminates routine operational overhead. It allows the team to focus on product development rather than infrastructure management.
“Launching your website should be just another box to check.”
Backend and Frontend Structure
We know you already want to take site deployment off your plate, but first, let’s look at an example of a backend and a frontend that will be used in AWS App Runner.
Backend
In this code, we start by launching PostgreSQL and Redis via Docker.
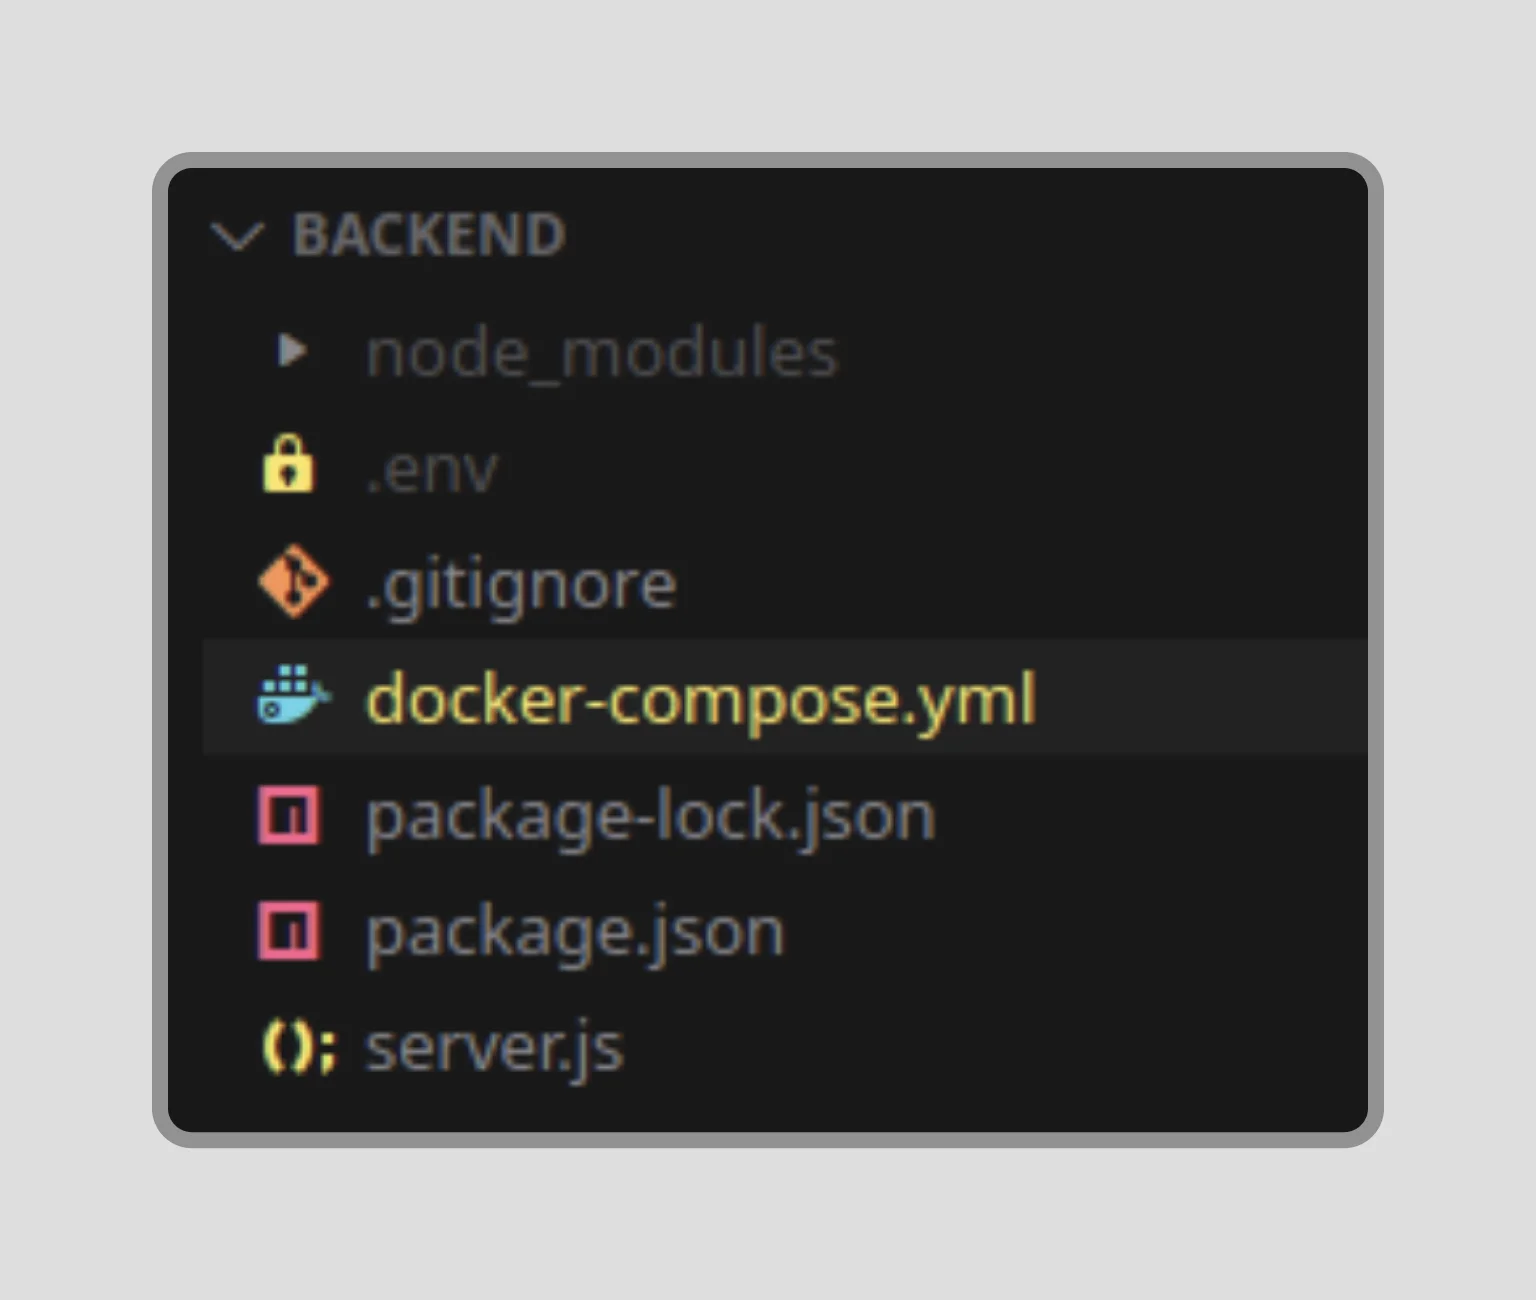
Pro tip: All configuration variables must be taken from the .env file. This is especially important for AppRunner, as the service lets you provide secrets and environment variables safely, without putting them in the code.
The server.js file code
Basically, we need this backend to take care of storing our data securely, speed up the app with some smart caching, and make sure it all runs without issues in a cloud setup. Below, you can follow the backend structure step by step and take notes for your own reference.
If you need more backend guidance, our article, Building a backend without a hassle, can help.
Frontend
The frontend structure is built using a React application that retrieves the backend URL from config/environment.js.
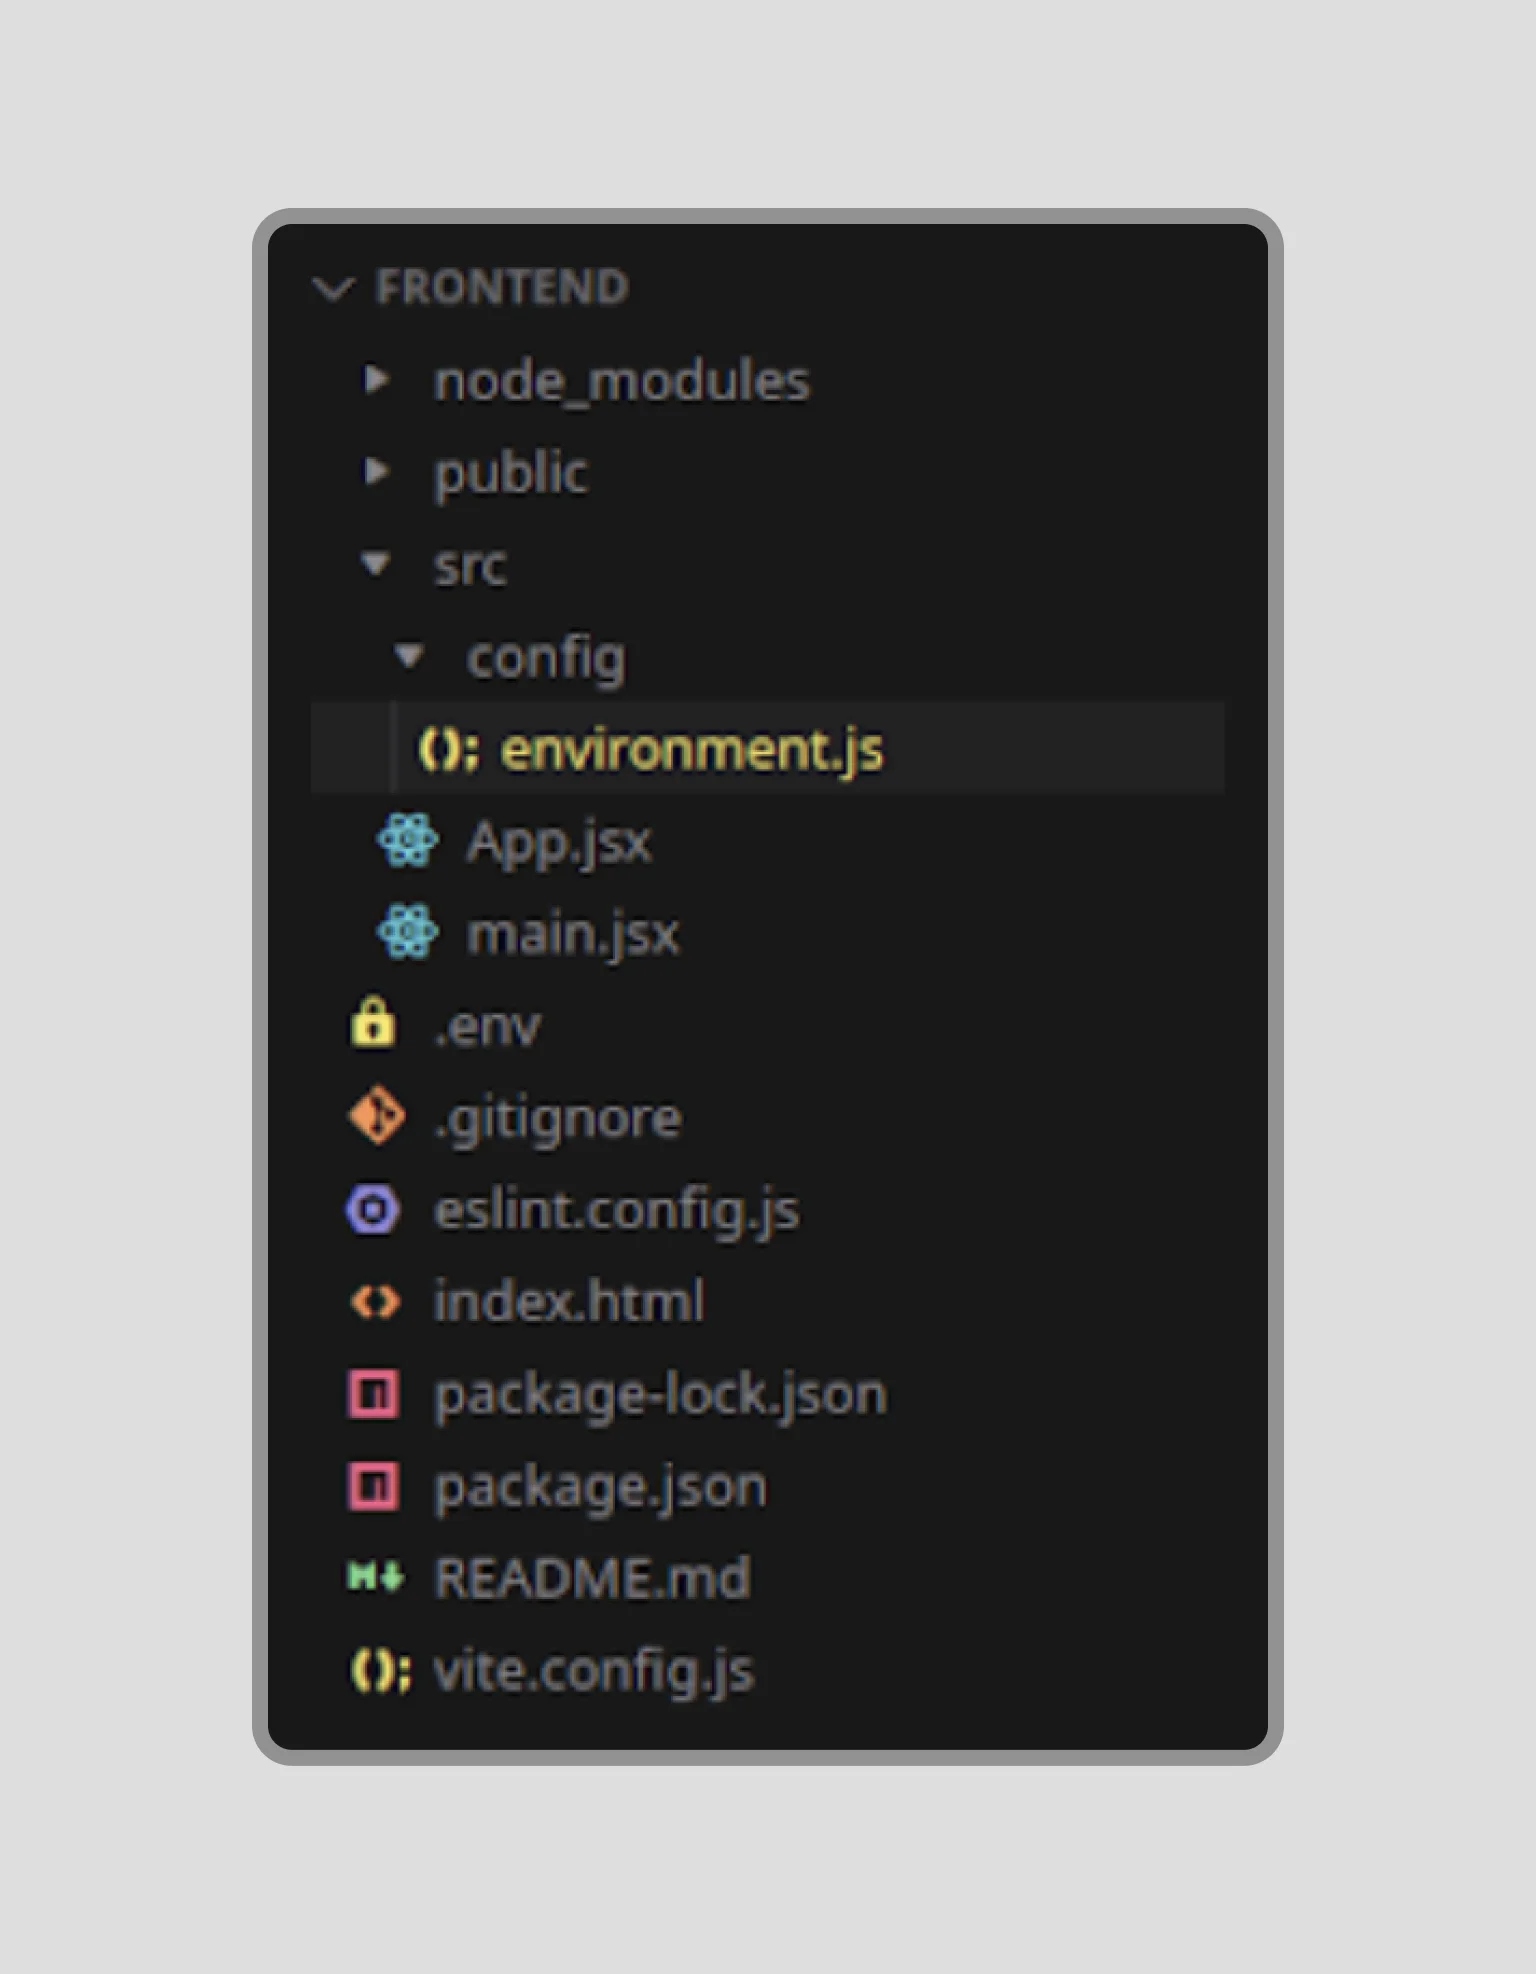
The App.jsx file code
Upon page rendering, the frontend sends a request along the default path and displays the response. After clicking the button, the application further accesses PostgreSQL (/db) and Redis (/cache) via the backend and displays the received data on the page.
Once again, you can look at the frontend half of the same application we showed earlier and take notes to shape your frontend.
When we’ve verified that all the components are working together, we get a solid example of how to build scalable, production-ready applications for the cloud. From here, we can proceed with the implementation.
Step-by-step implementation (via AWS Console)
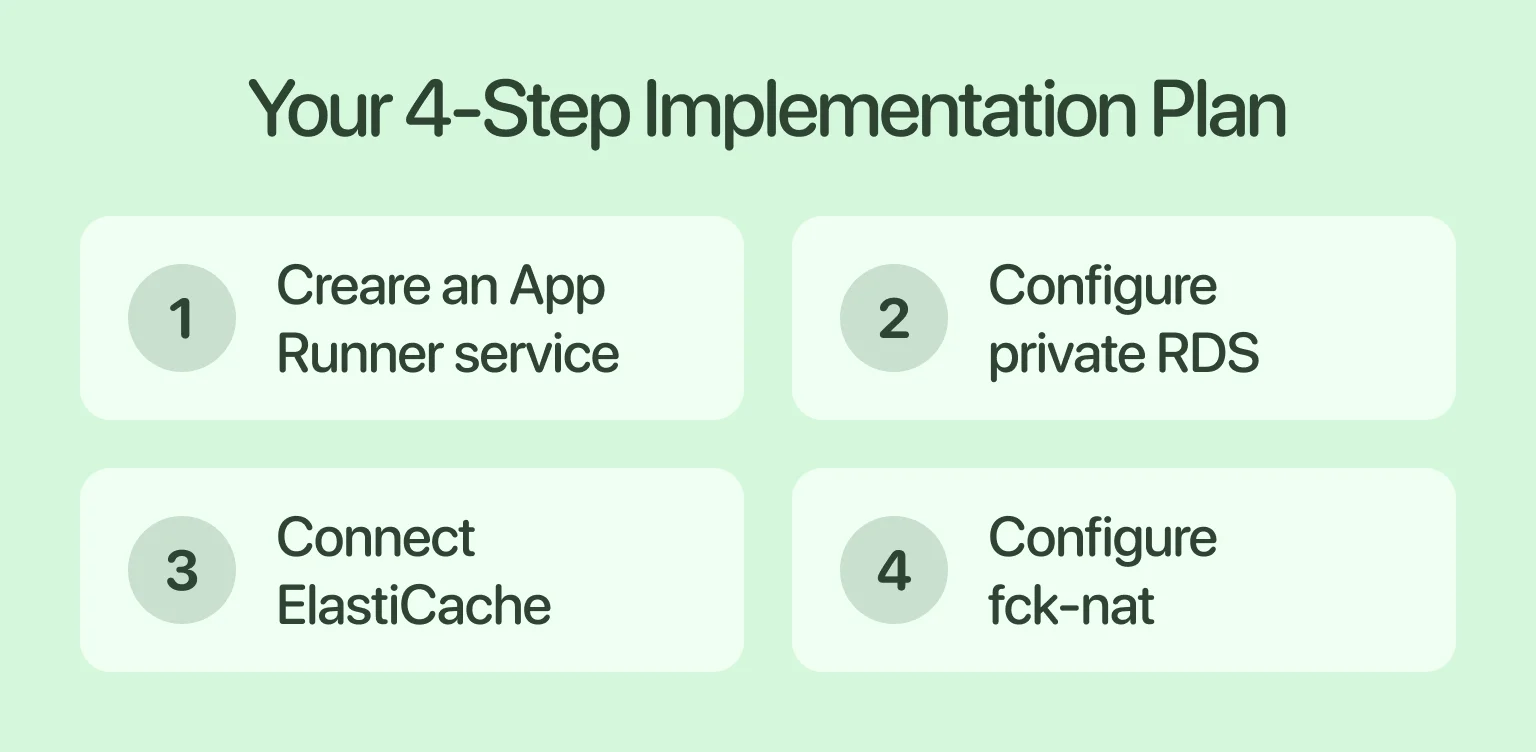
Equipped with a solid backend and frontend structure, the only thing that can bottleneck the deployment of your site is a chaotic workflow. To avoid this, we offer a four-step plan that starts with creating an App Runner service. Next, you configure private RDS and connect ElastiCache, and finally, you wrap it up by configuring fck-nat. If things are still unclear, stick with us, and it’ll click.
Creating an App Runner service (frontend+backend)
The main task now is to provide access to our applications on the Internet. To understand how to do this, follow our lead and create both a backend and a frontend in App Runner. Then, check if they can interact with each other.
First things first, you should go to your AWS Console and type App Runner in the search. Once you land on the page, you will be offered to create a service; click “Create an App Runner service” and you will get to this page:

Select the required fields, as shown above. You can use the “Container registry,” but to keep the example simple, we will select “Source code.” This way, AWS pulls the code changes directly from the repository.
Next, we are sent to the Configure build (only if you selected “source code”). In the Build settings, we choose the configuration file, the start command, and the build command. As for the port, any can be chosen. See the page below to tie these concepts to the visuals:

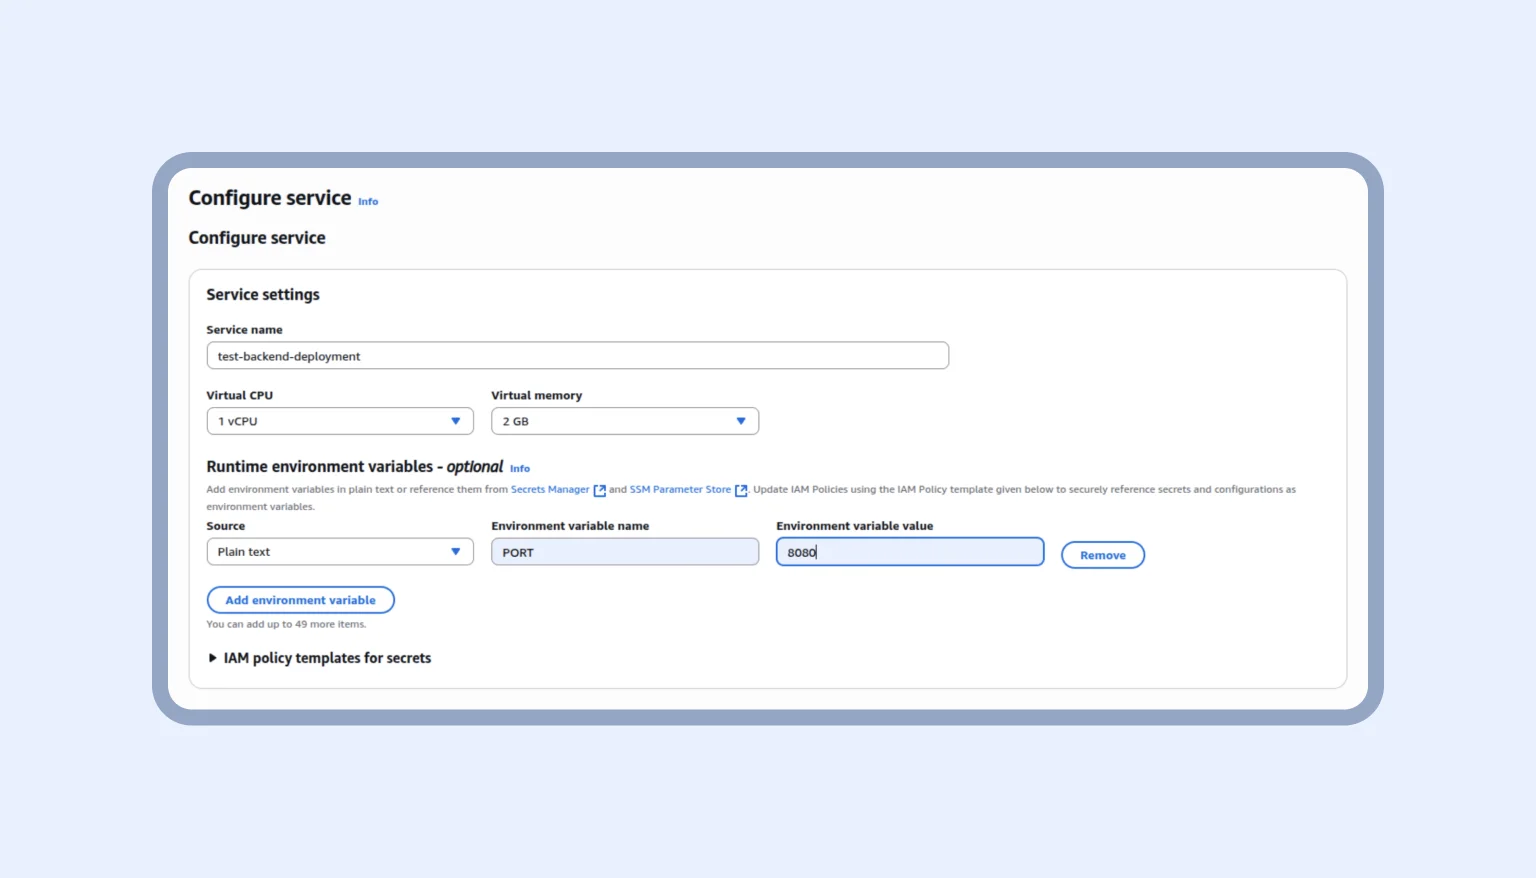
After that, we get to the configure service page. We need to do two things. It’s about choosing the service name and specifying our variables. For now, we add only these configurations.
Next, we create the App Runner service, wait 10-15 minutes, and then go to our application. Voilà, the App Runner for your backend is ready!
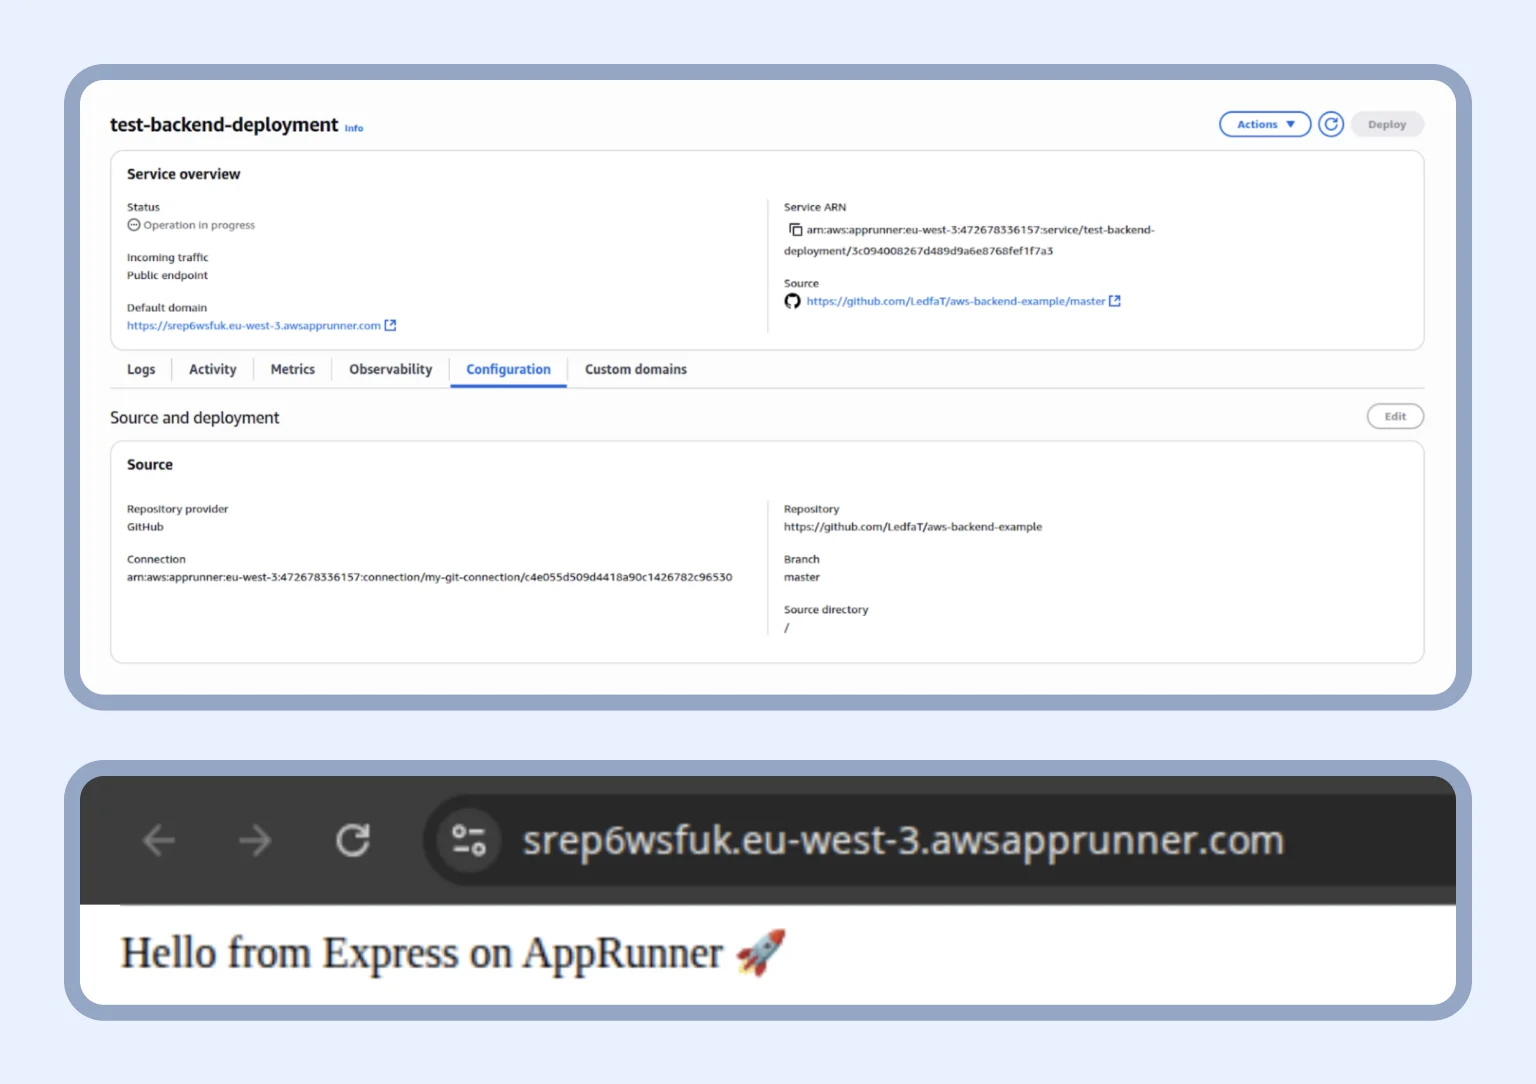
Moving on, we create the App Runner for the frontend using the same principle. Once your full application (React frontend + Express backend) has been successfully deployed, you will see this screen:
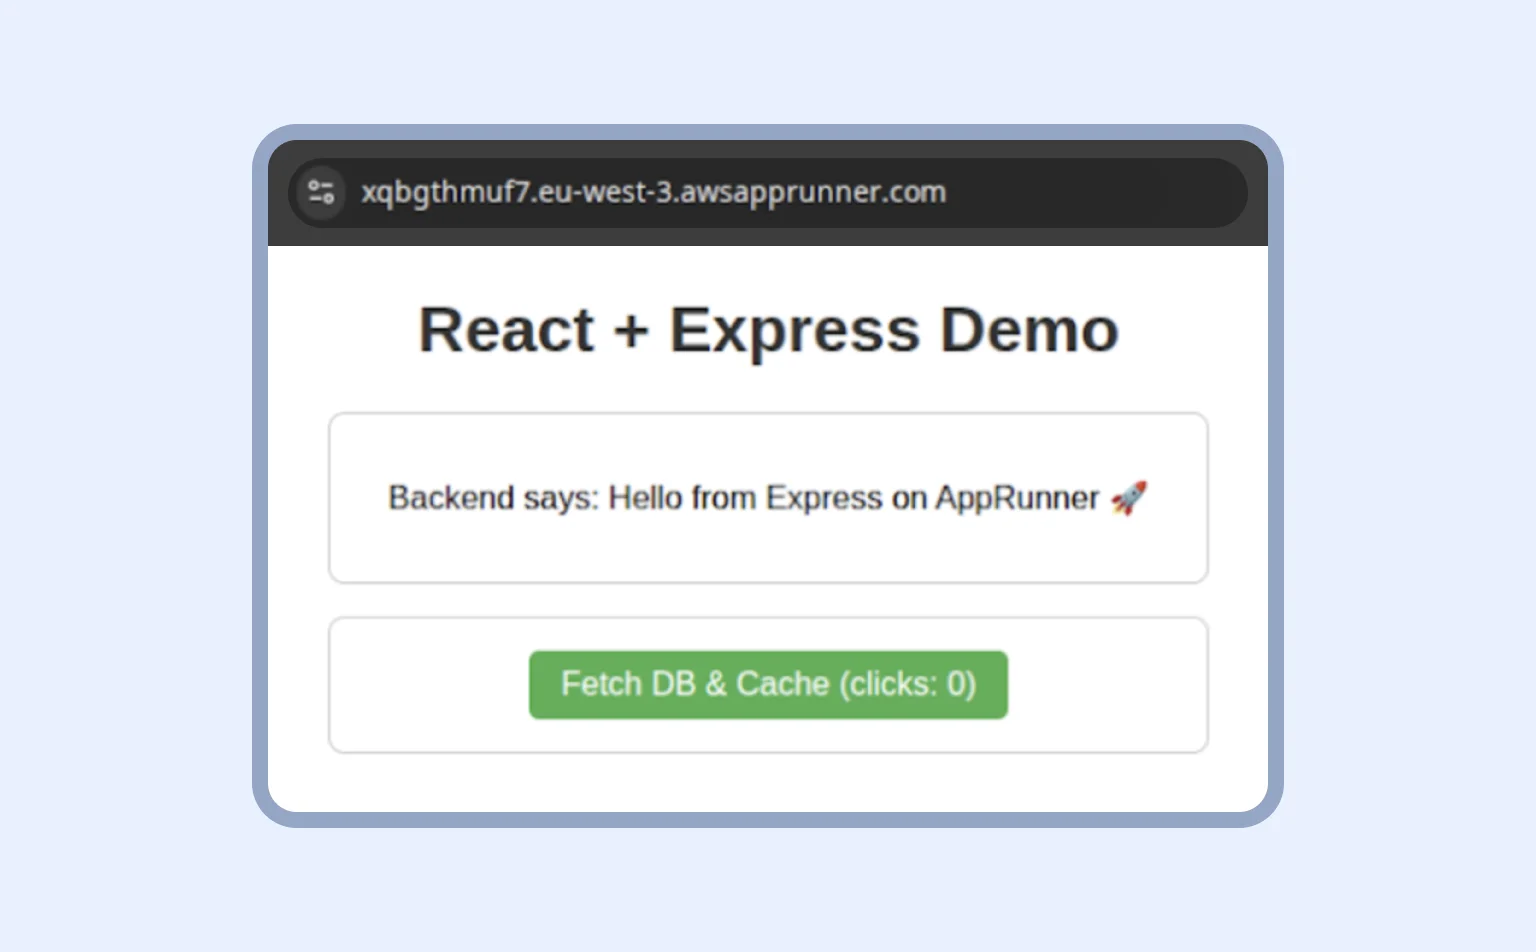
Now, your frontend and backend are working together on App Runner. And if they are not, contact us for consultation.
“App Runner offers one-time configuration and fast deployment.”
Configuring private RDS (PostgreSQL)
You don’t have to ask Jeff Bezos to know that in AWS, the database always runs inside a VPC (Virtual Private Cloud). It is an isolated virtual network where we control addresses, subnets, and access to resources ourselves. If RDS is launched without a VPC, it will be too open to the whole world, which is dangerous. Therefore, before creating our database, we need to prepare the environment in which it will work.
One of the components of the mentioned environment is a security group. Think of your database as a safe with important staff. Then, your security group is a firewall guard that protects it. In essence, RDS must accept connections only from our AppRunner service, and no one else. For that reason, in the security group, we open port 5432 (the standard PostgreSQL port) for traffic coming from the AppRunner group. This way, our database will be private.
Within the VPC, there are also subnets — subdivisions that break down the entire network into logical segments. They allow resources to be placed in different Availability Zones to increase reliability and control which resources can see each other. For instance, we can place the database in private subnets and use public subnets for AppRunner or other services that need to hit the Internet.
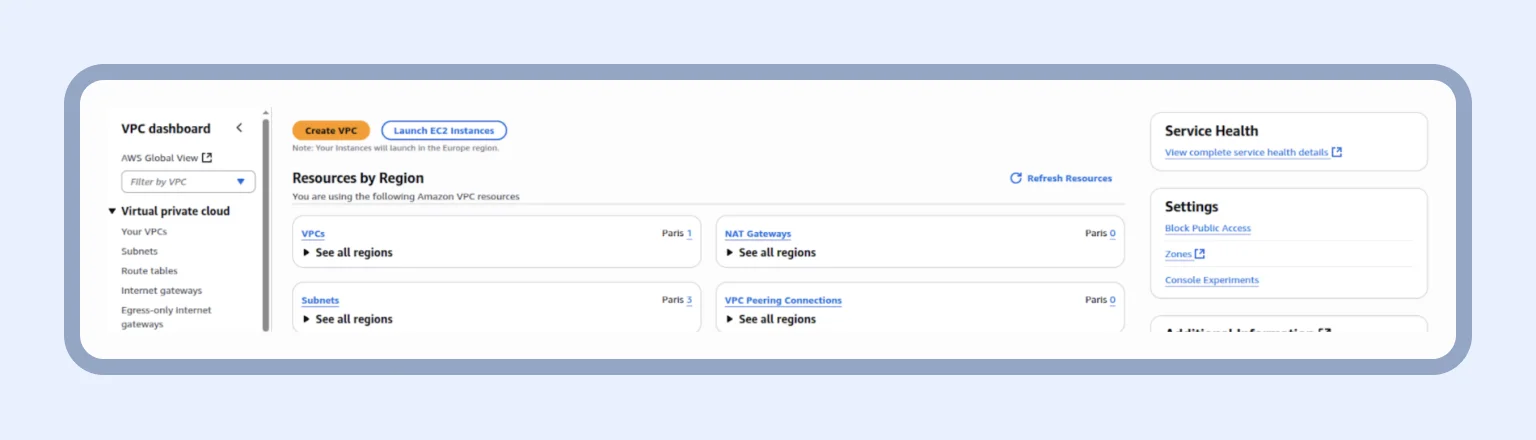
Just as we searched for AppRunner, we need to find Virtual private cloud (VPC) and click “VPCs” and “Create VPC:”
Next, we provide a tag for the VPC, which is our-first-vpc in our case. After that, we specify the IPv4 CIDR — 10.0.0.0/16. This is the private network access range that can be used within the mentioned VPC.

The next thing required to tackle is creating subnets for our VPC. In the sidebar menu, we navigate to “Subnets” and “Create subnet.” And just like that, we end up here:
We add two subnets to our VPC, public-subnet-1 (10.0.1.0/24) and private-subnet-1 (10.0.2.0/24).
Pro tip: IPv4 subnet CIDR blocks define the range of IP addresses in the subnet. For example, 10.0.1.0/24 means the subnet starts at address 10.0.1.0 and contains 256 addresses. Simply put, the public subnet can host resources that need Internet access, while the private subnet can host internal resources like RDS.
Having covered subnets, we immediately create security groups for both App Runner and RDS. You might wonder why we need separate security groups for both RDS and App Runner. Our developers have good reasons for that.
- For App Runner, a security group is required so that the service itself can connect to other resources within our VPC
- For RDS (PostgreSQL), a security group is created with inbound rules that allow connections only from the App Runner security group.
Now that you understand the reasons, let’s get down to implementation.
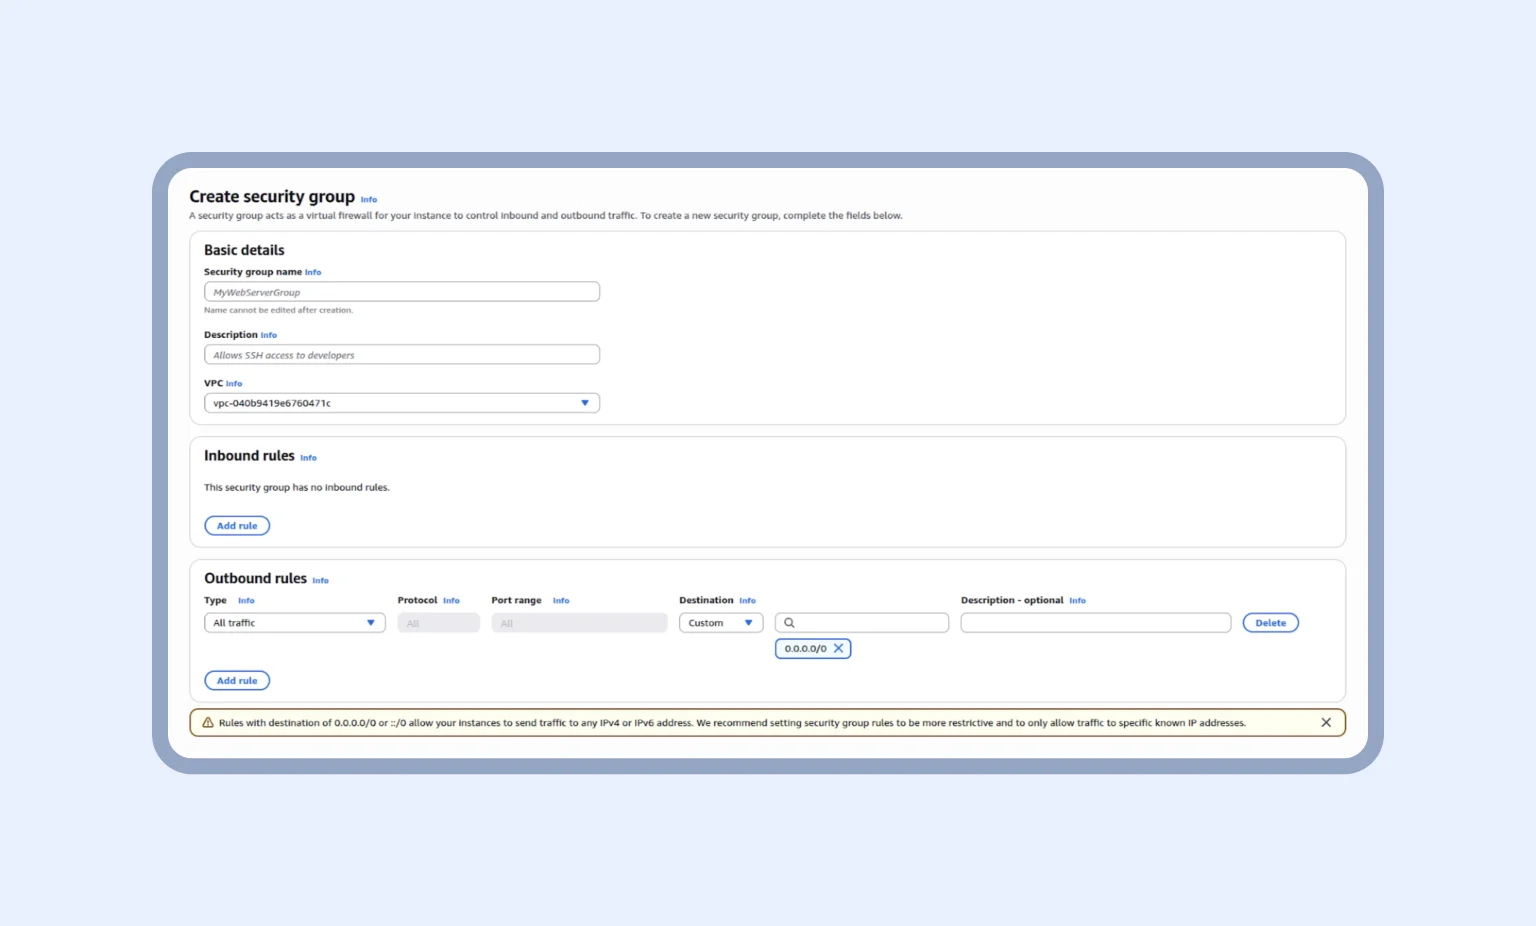
In the sidebar menu, click “Security groups” and “Create security group.” For App Runner, you need to select our VPC and give it a name. By the way, we don’t need inbound rules in this case because App Runner handles external traffic on its own. However, outbound rules open access to our database and Redis.
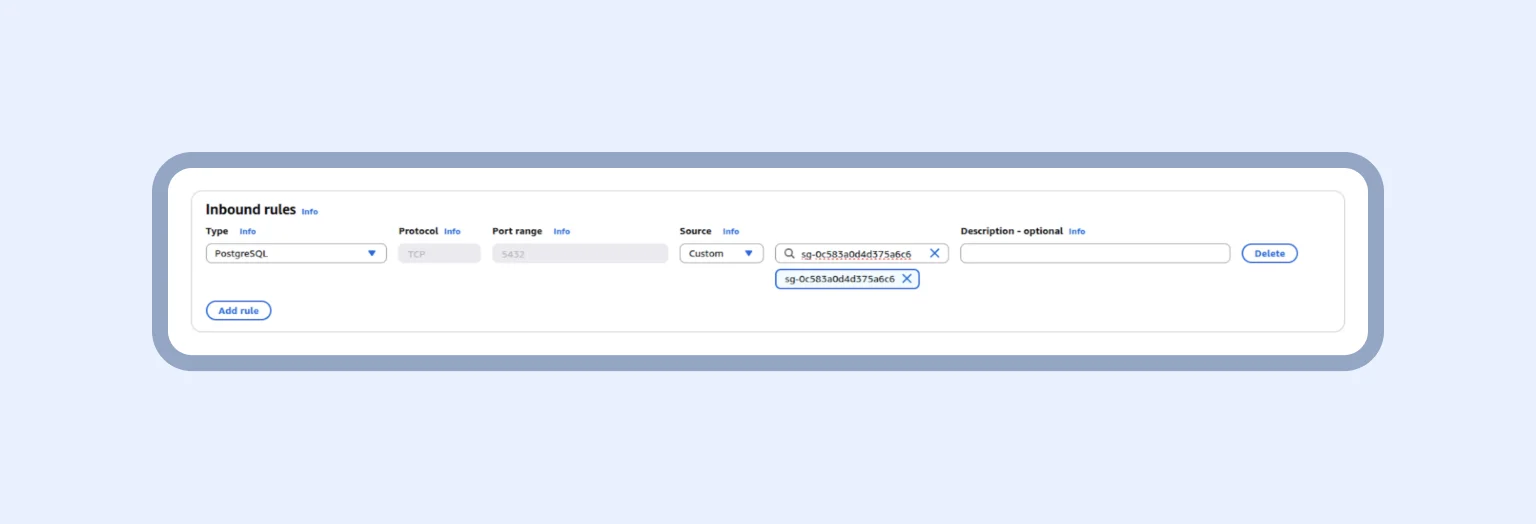
For RDS, we repeat the steps but also add inbound rules. Imagine you allow entry on port 5432 only from your AppRunner’s security group. This means the database will accept connections only from your application, and no one else. Finally, in the source, we add the AppRunner security group that was created previously.
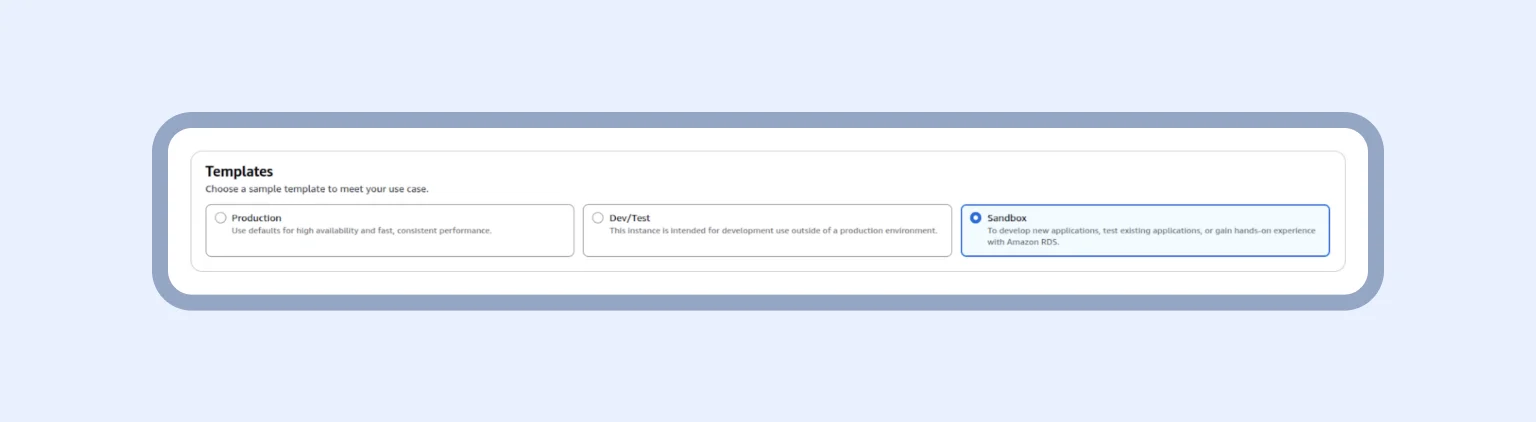
Now, we are all set to create the database. In the AWS Console, search for “Aurora and RDS”, then go to Databases -> Create database. From there, select PostgreSQL as the engine and choose the desired version. Since this database is for testing, select the Sandbox template. Then continue with the remaining setup steps — name the database and set a password.
Next, we need to define how the database will be reached inside our AWS network. Move to Connectivity configuration:
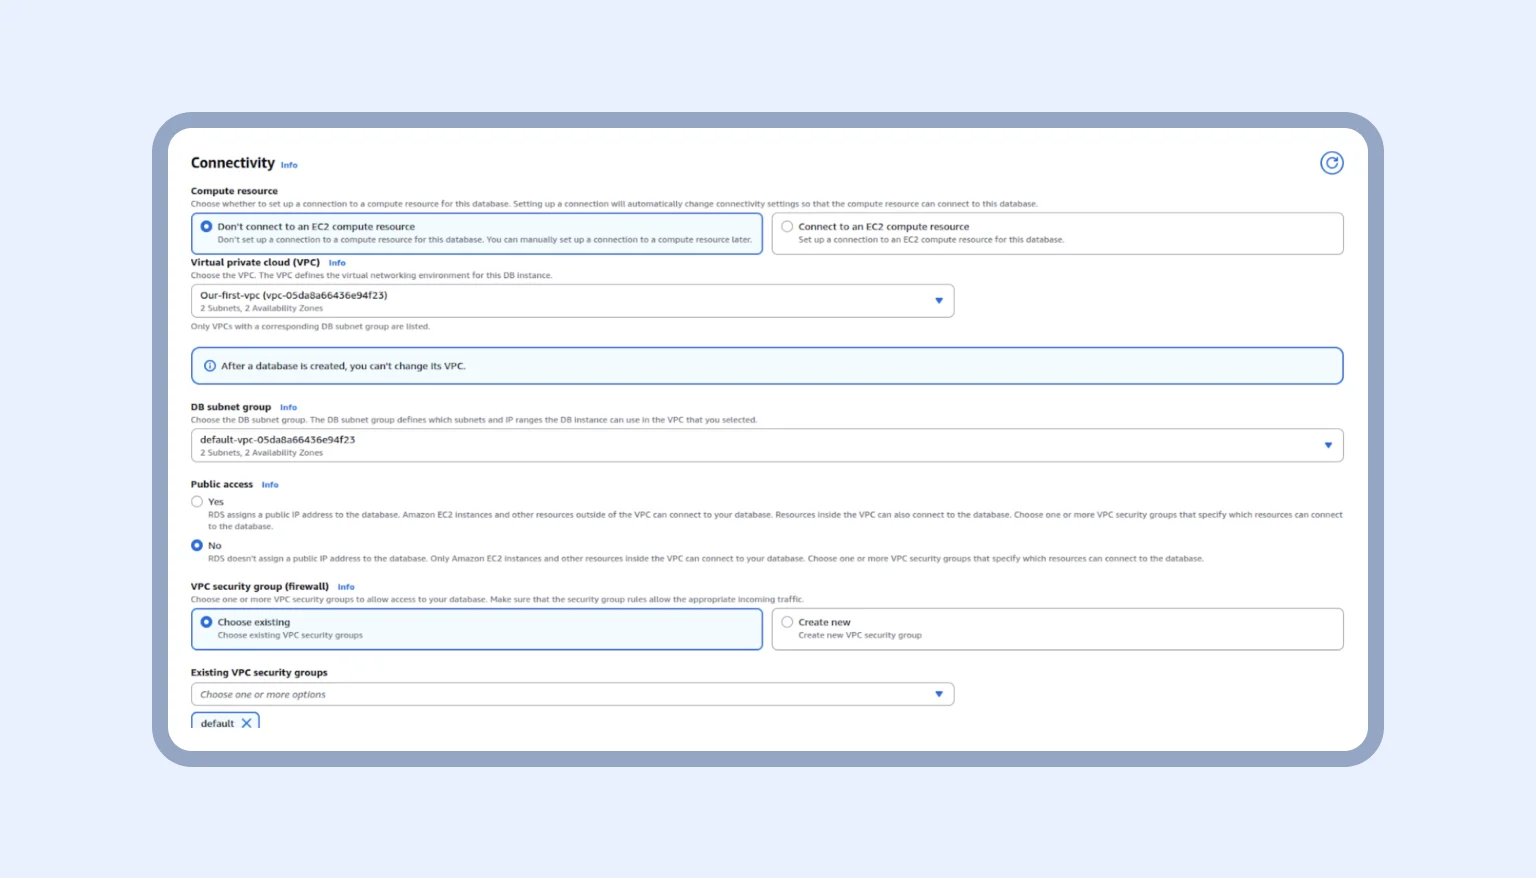
To keep it simple, on this page, we are configuring who can find and talk to our database. We have a few choices, but how do we make them work?
- Compute resource: Click here, “Don’t connect to EC2.” App Runner connects directly, so EC2 is not needed
- VPC: Select the common VPC for App Runner, RDS, and ElastiCache so they can communicate using private IPs
- Network type: Choose IPv4, which is simpler and sufficient for all services.
- Note: In the current RDS interface, that option is inside the VPC selection and additional connectivity settings
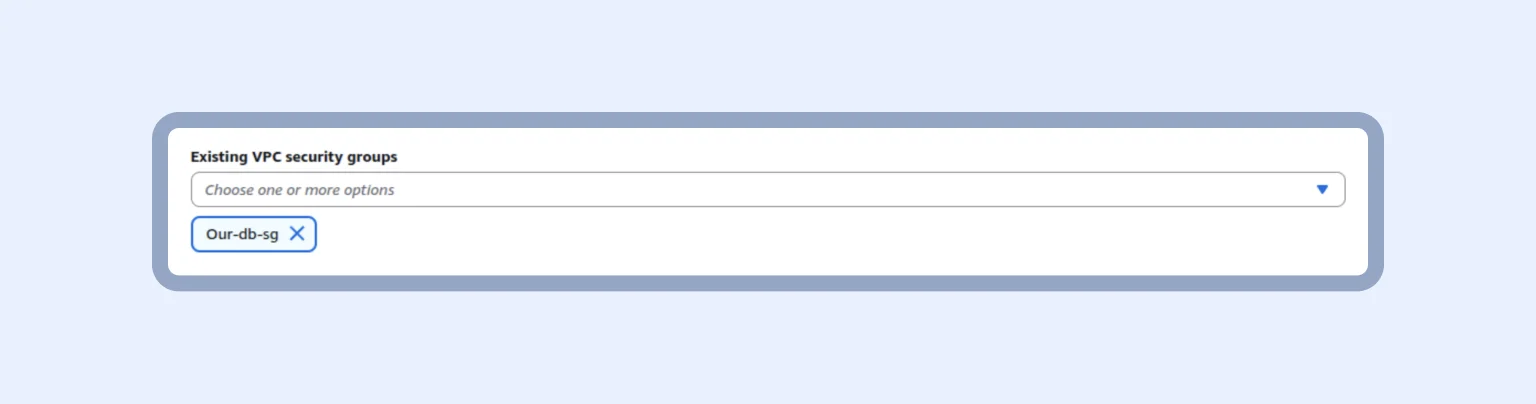
There are many more settings, but we will stop here. Here is our security group for the database:
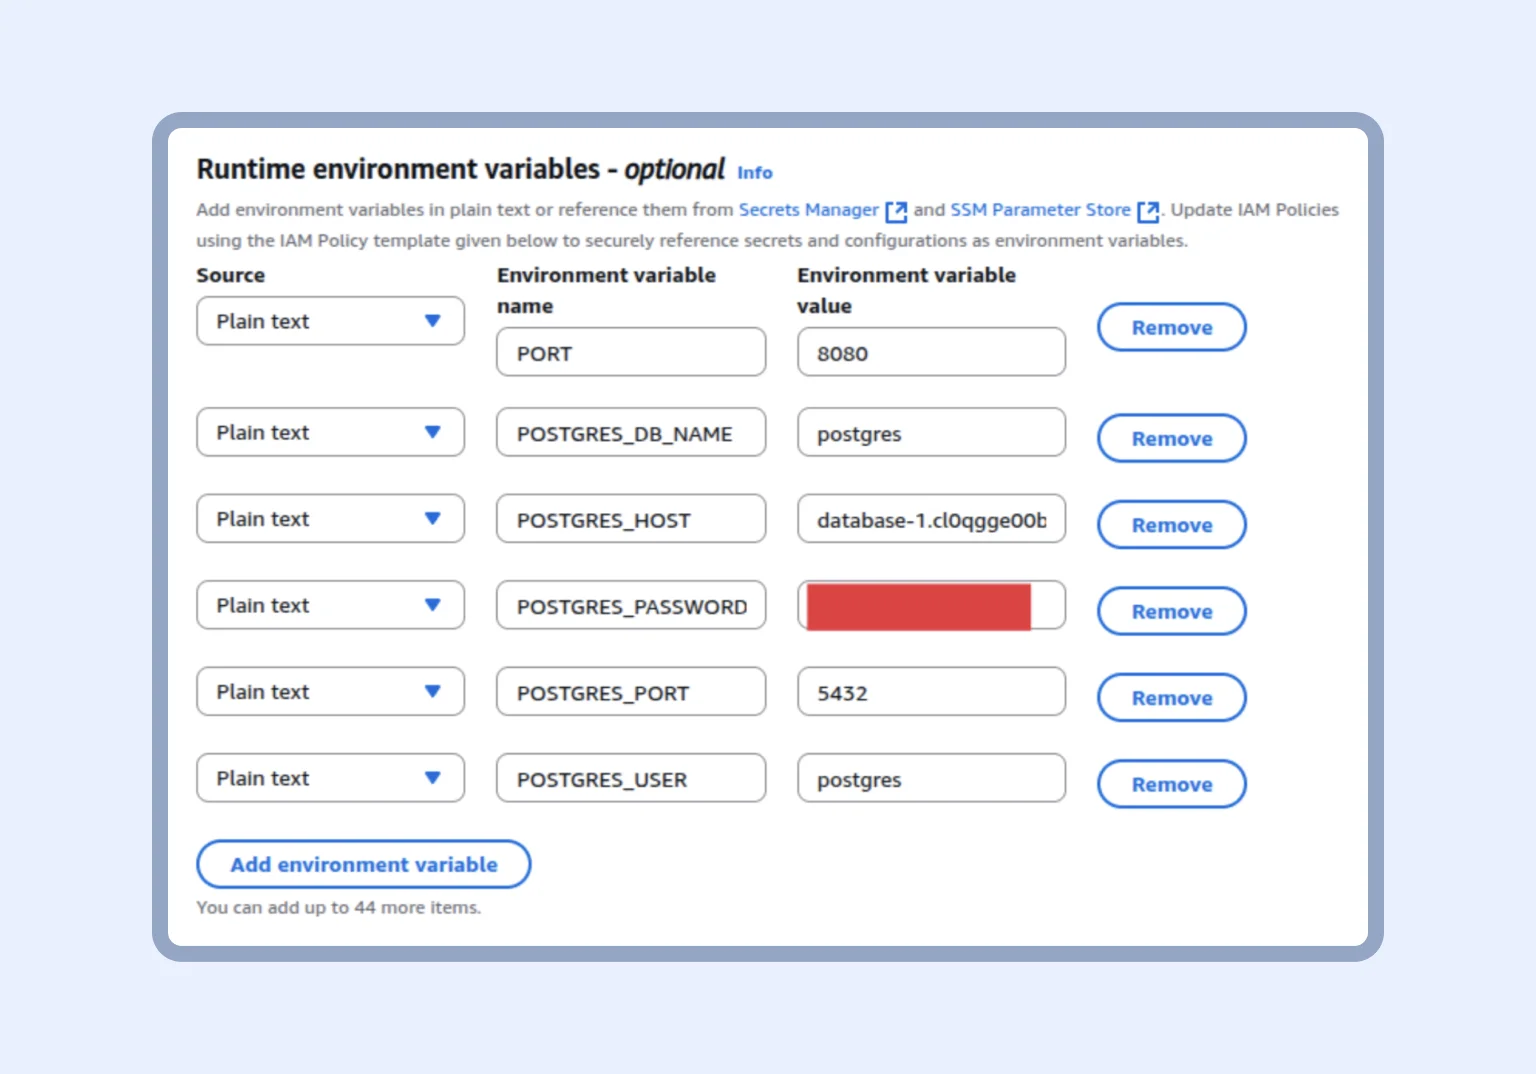
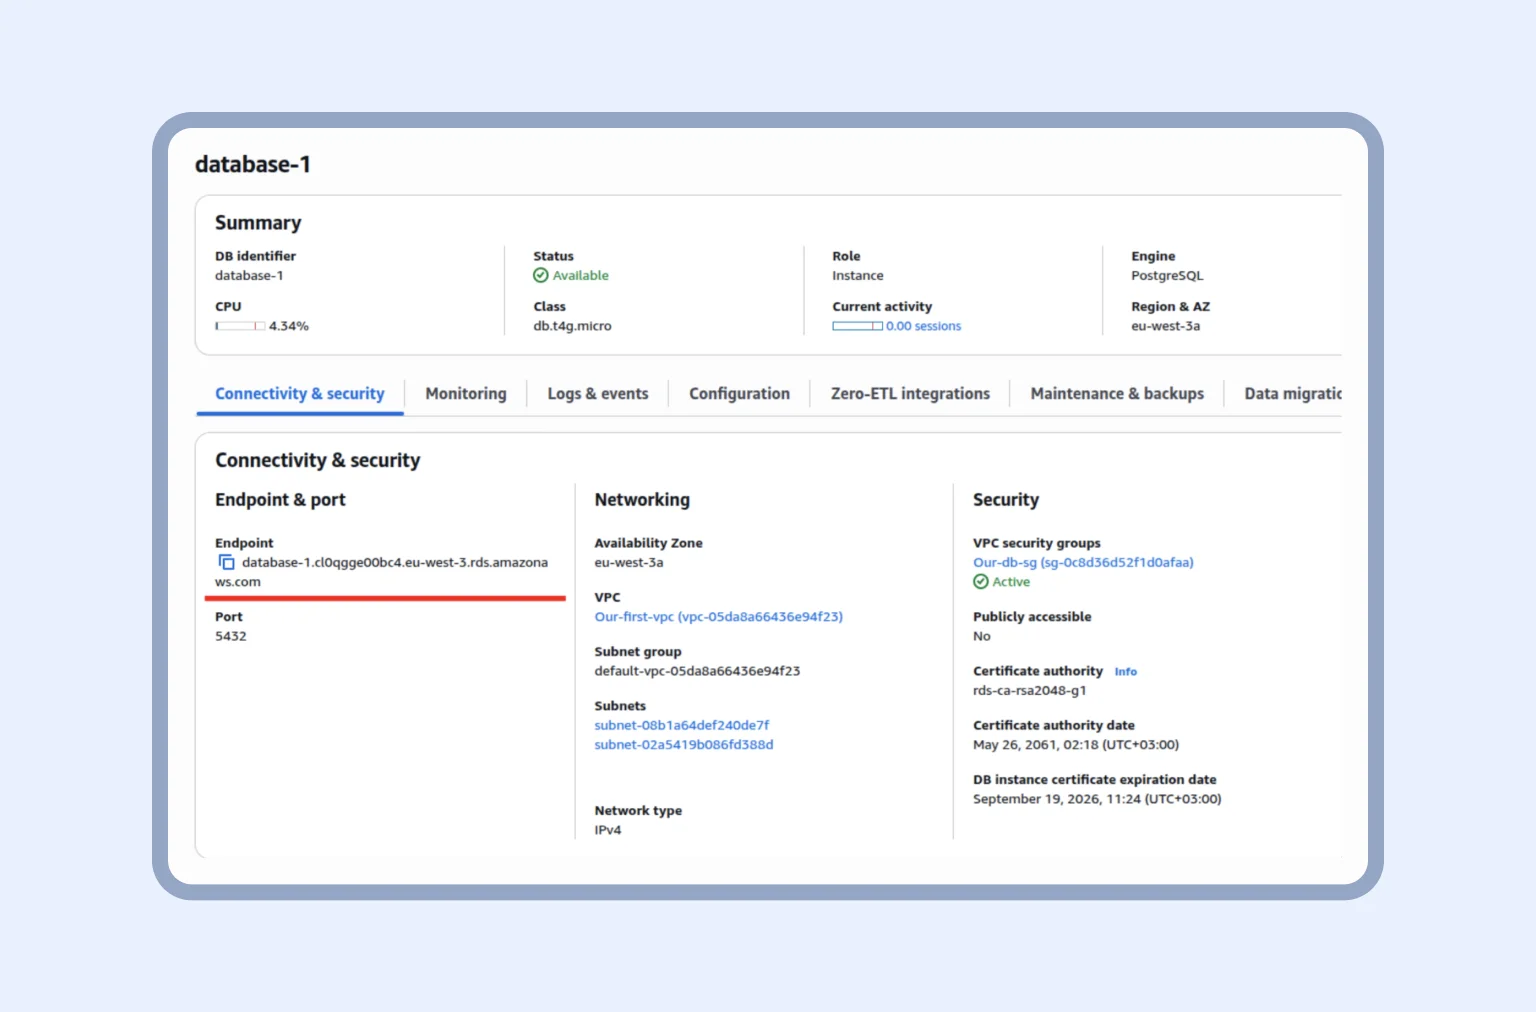
Finally, we can connect our database to the backend service. We go to our App Runner -> Configuration -> Configure build -> edit. At this step, we provide the necessary environment variables. The database name defaults to “postgres,” and you can find the host address on the database page.
Now, in the “Networking” section, we add a new VPC connector. A VPC connector is a special “bridge” that connects the AppRunner service to the VPC in AWS.
If you scroll down, you see the “Outgoing network traffic” section. Here, we choose “Custom VPC” and add the VPC that we created, as well as the subnets and the security group for AppRunner (see the “Add new VPC connector” page).

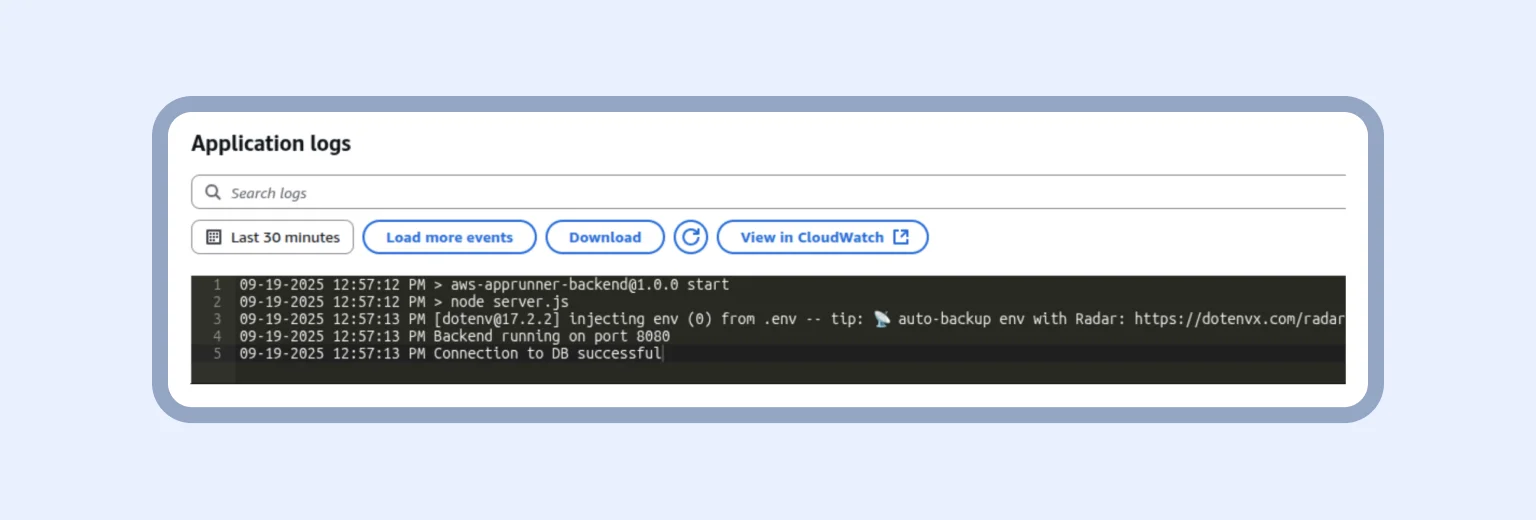
The only thing left to do is save all changes and wait. As soon as we see the “Connection to DB successful” line, we can connect to Redis. Spoiler: The process is similar to connecting PostgreSQL, but happens faster because most of the infrastructure is already set up.
Connecting ElastiCache (Redis)
When creating a security group for Redis and setting up its inbound rules, follow the same steps you used for RDS. And once you create the Redis cluster, add this group to it.
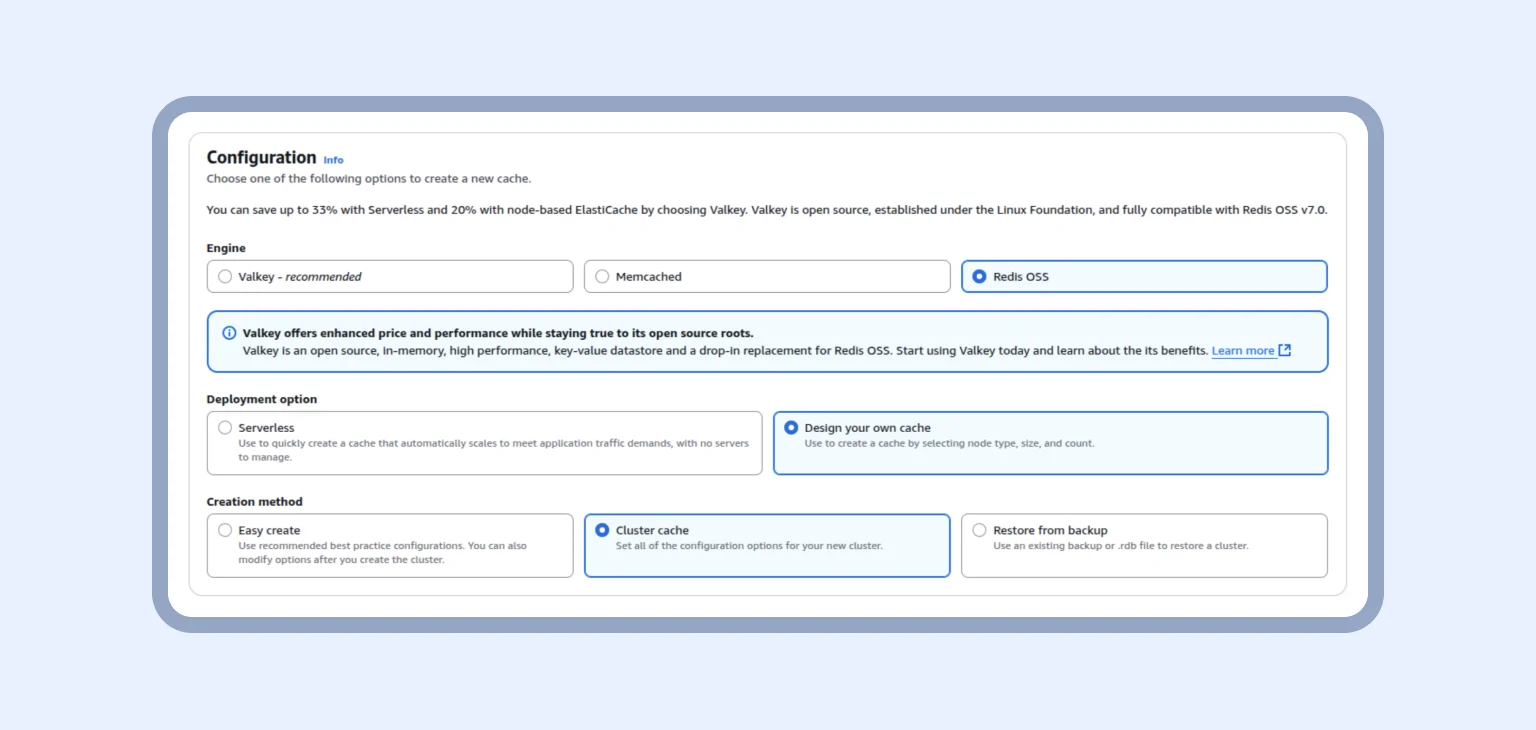
To create a Redis cluster, you need to locate the ElastiCache service and get started — check out the Configuration below to choose the right engine, deployment option, and cluster cache.
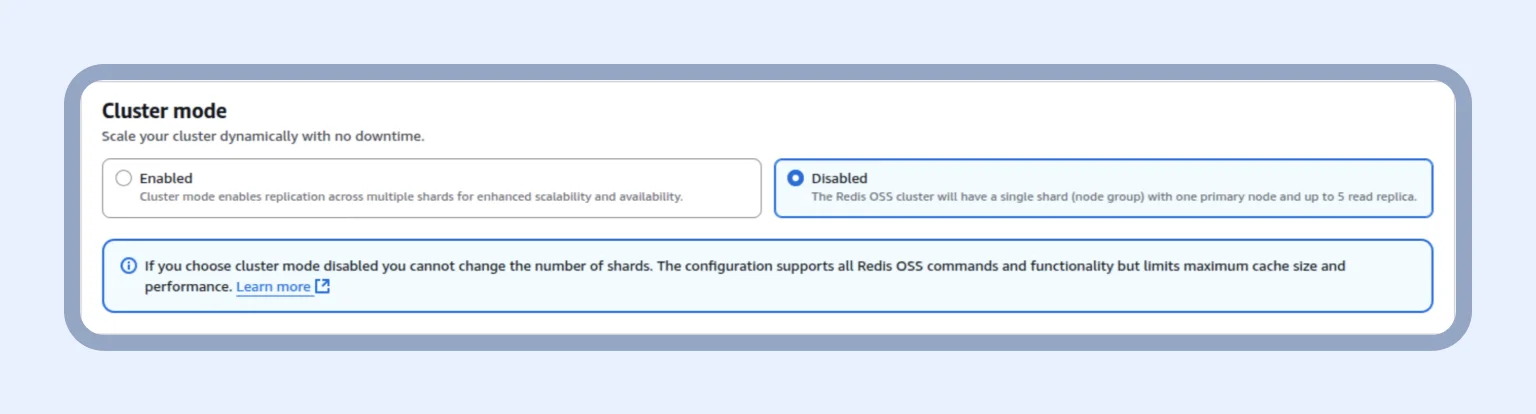
As you can see below, we left Cluster mode disabled, as scaling through multiple shards is not required for a test project. One primary node with a couple of replicas is sufficient.
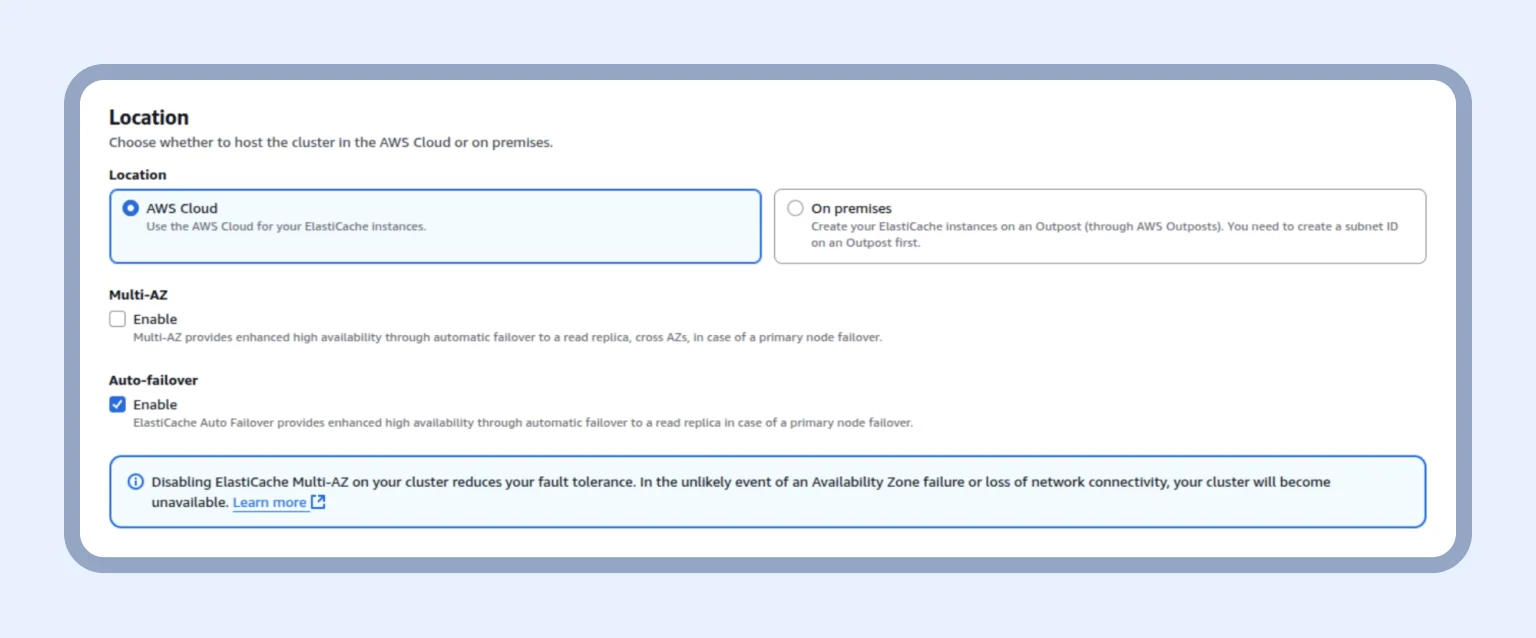
Next, we choose where our cluster will be placed — specifically, on AWS Cloud — and enable the Auto-failover option.
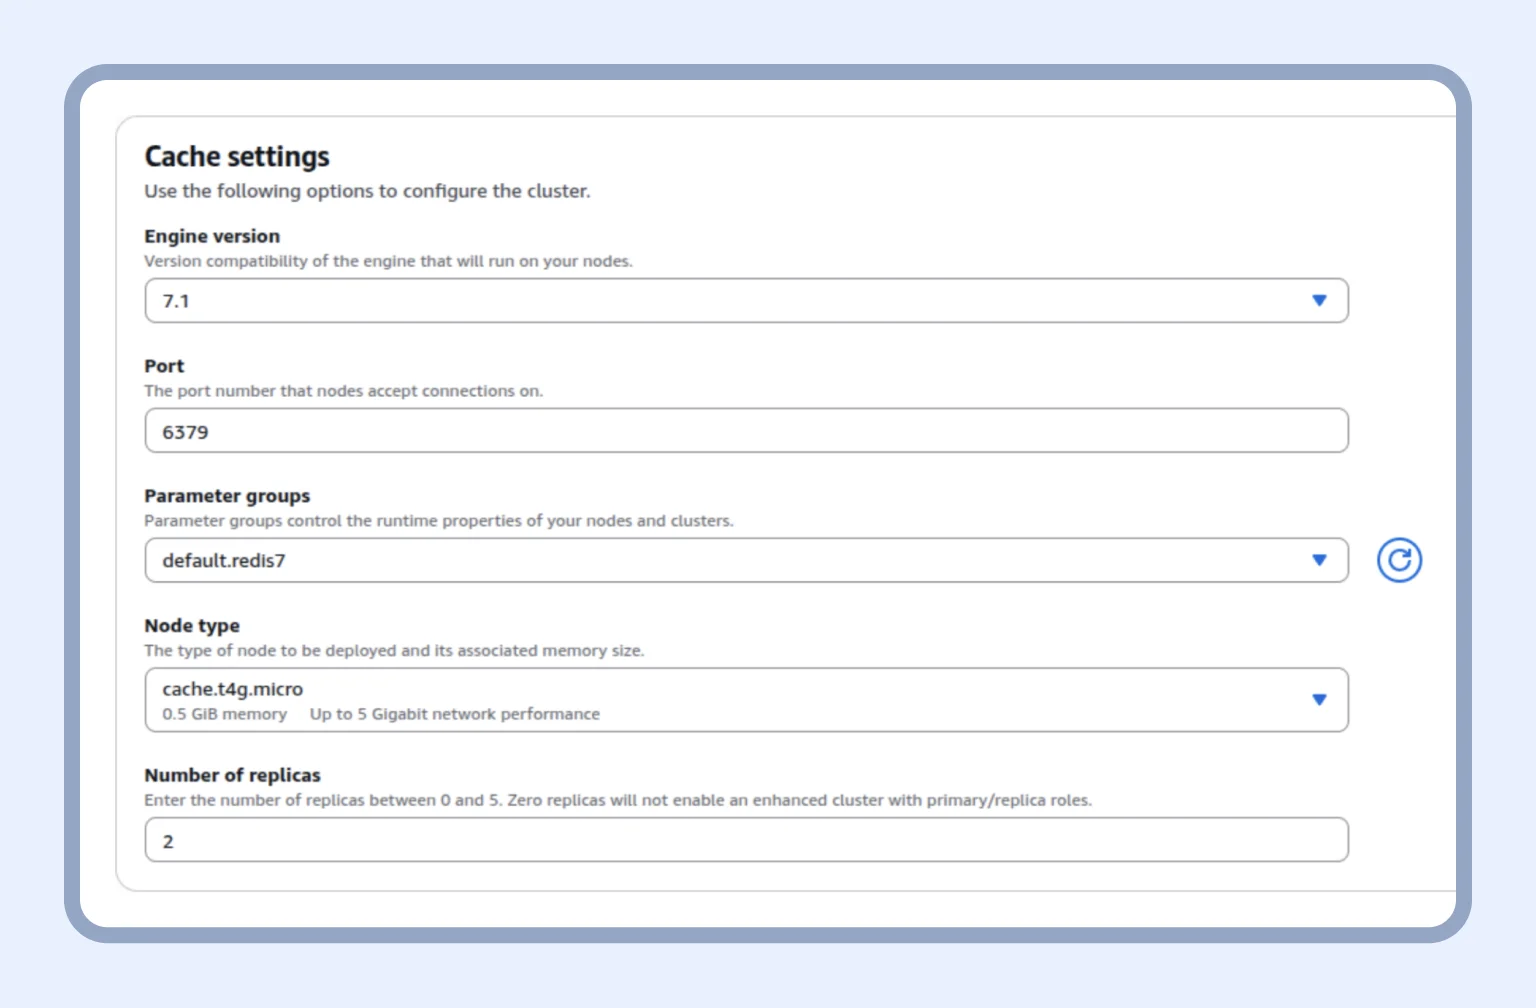
In cache settings, we keep the default settings, but select the node type based on the cluster’s load.
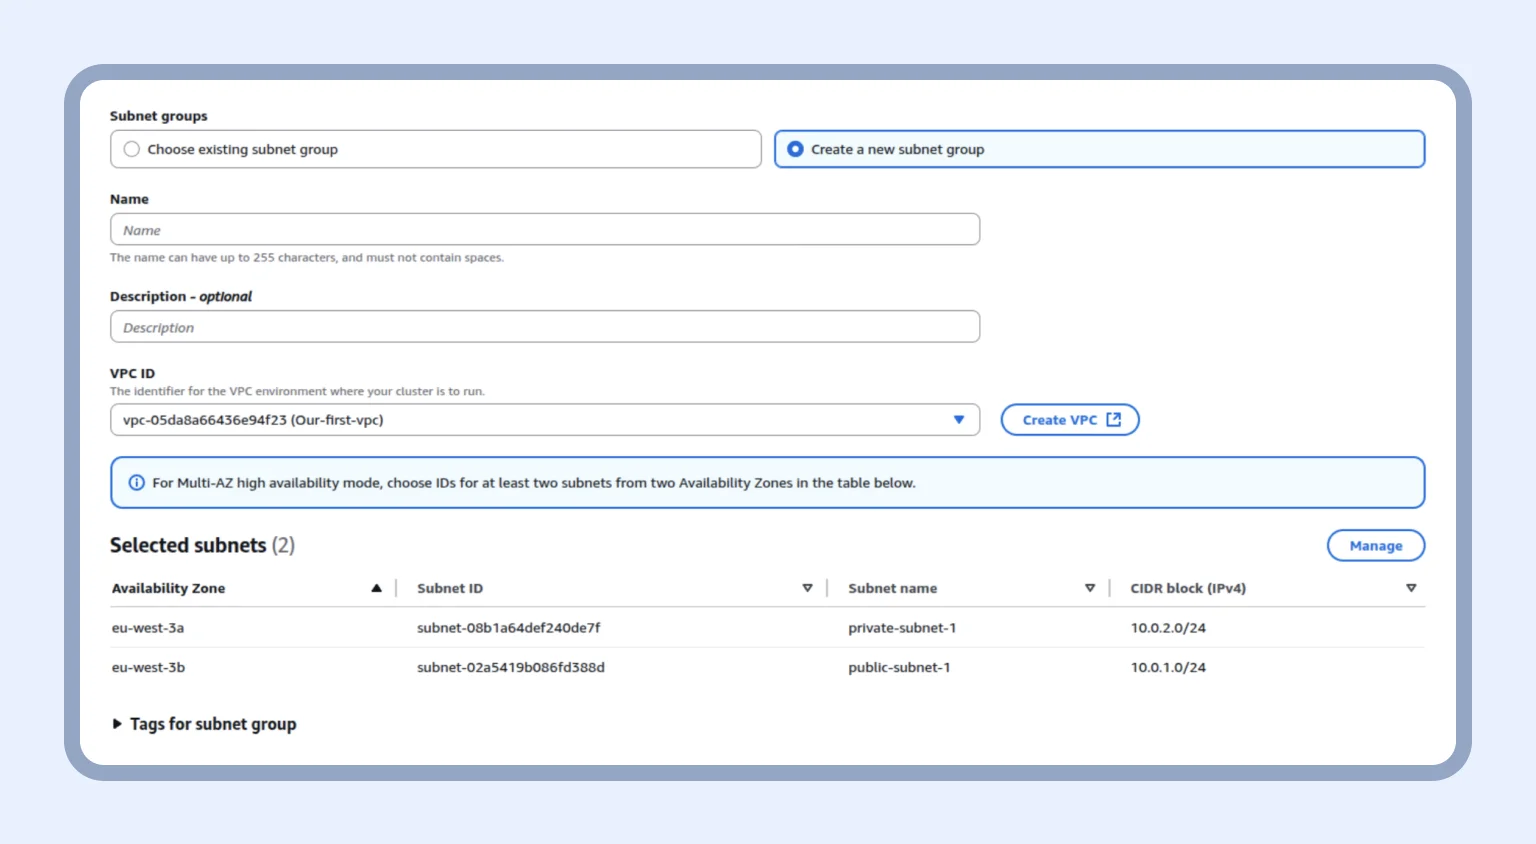
After that, we create a subnet group with our VPC and click “Next.”
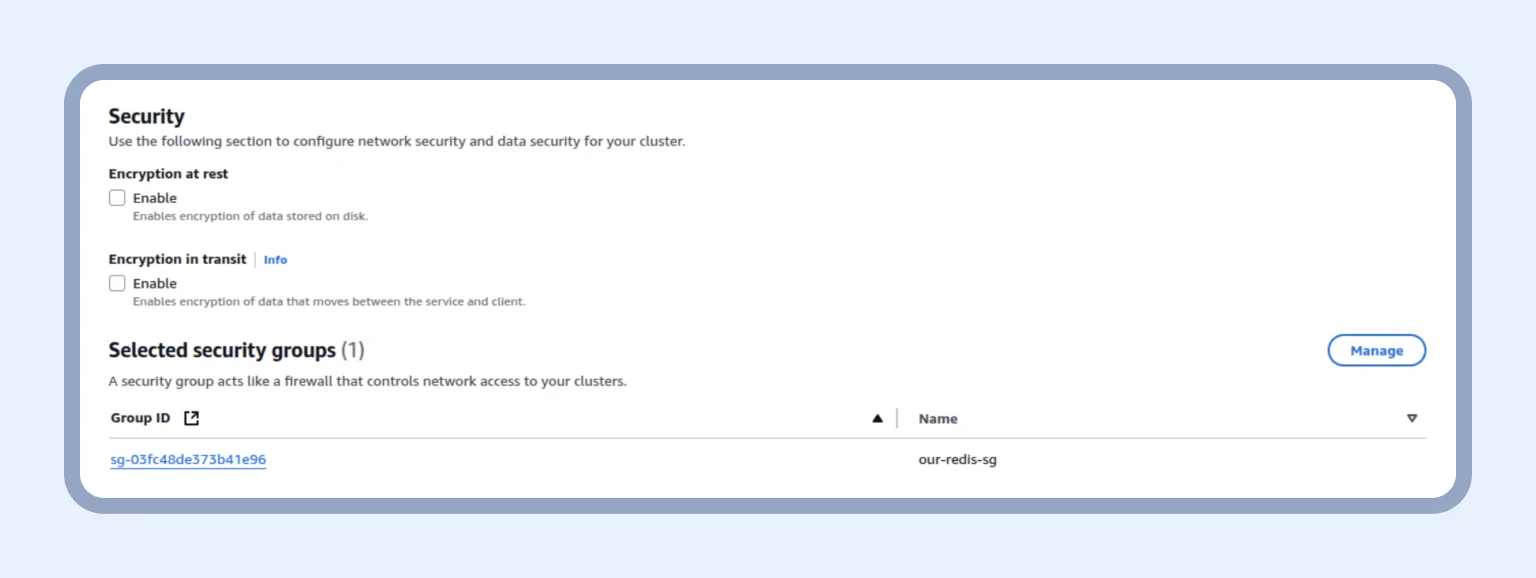
In Security, we disable “Encryption at rest” and “Encryption in transit” and add the security group that was created for Redis. Note: Do not do this in production!
Once we finish creating the Redis cluster, we copy the primary endpoint, add it and the port to the corresponding variables, and confirm that our service is running in the cloud.

If we click the button “Fetch DB & Cache” and get a 200 OK status code, our two applications are working together.

And it’s time for the last step — configuring fck-nat.
Configuring fck-nat
As time passes, you will need to enable private services, such as RDS, Redis, or App Runner, in private subnets to access the internet for downloading packages or calling APIs. This requires: a public subnet, an Internet Gateway, and configured route tables.
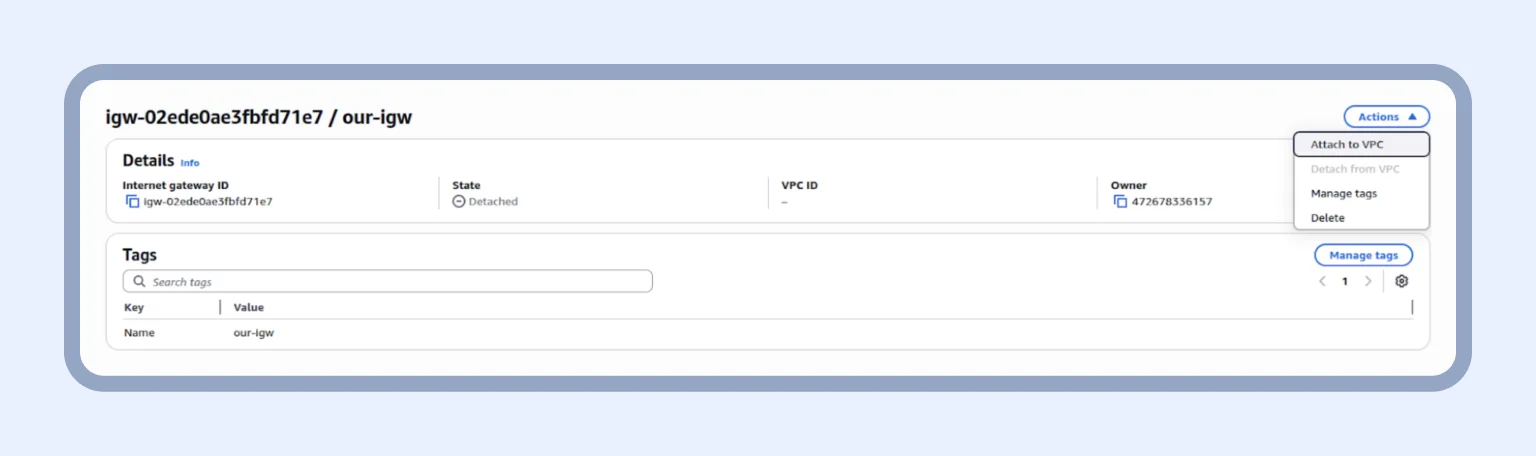
First, we need to create a new Internet Gateway. For this, we enter the VPC section and go to the “Internet Gateway” tab. Here, we create an Internet gateway by clicking on the orange button.

After creation, we must attach it to our VPC:
Next, we create a Route table. Think of it as a map that defines how traffic is routed within your VPC. Keep in mind that each subnet already comes with one by default.
Then, we go to the “Route tables” tab and again click on the orange button, but this time, we create a route table.

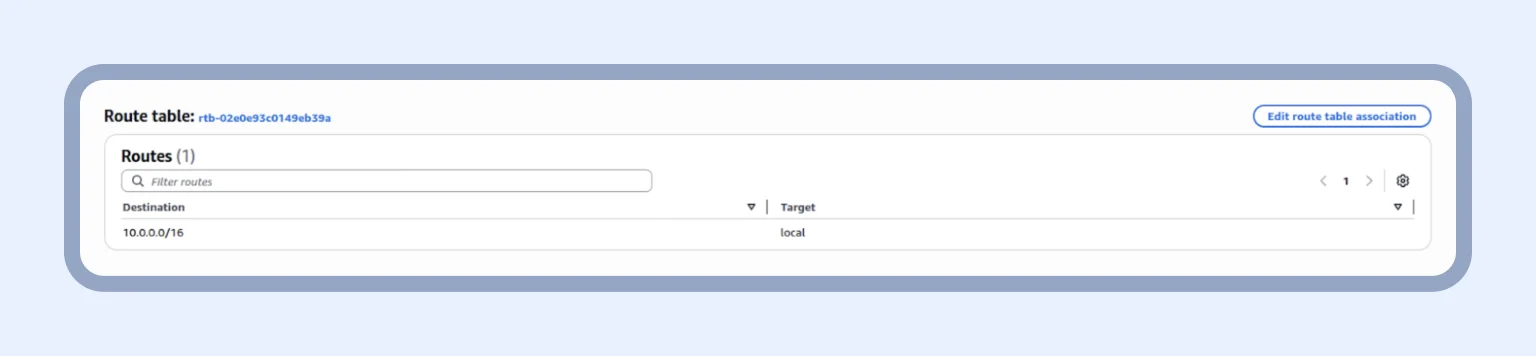
After creation, we open our new table and edit routes, as you can see below:
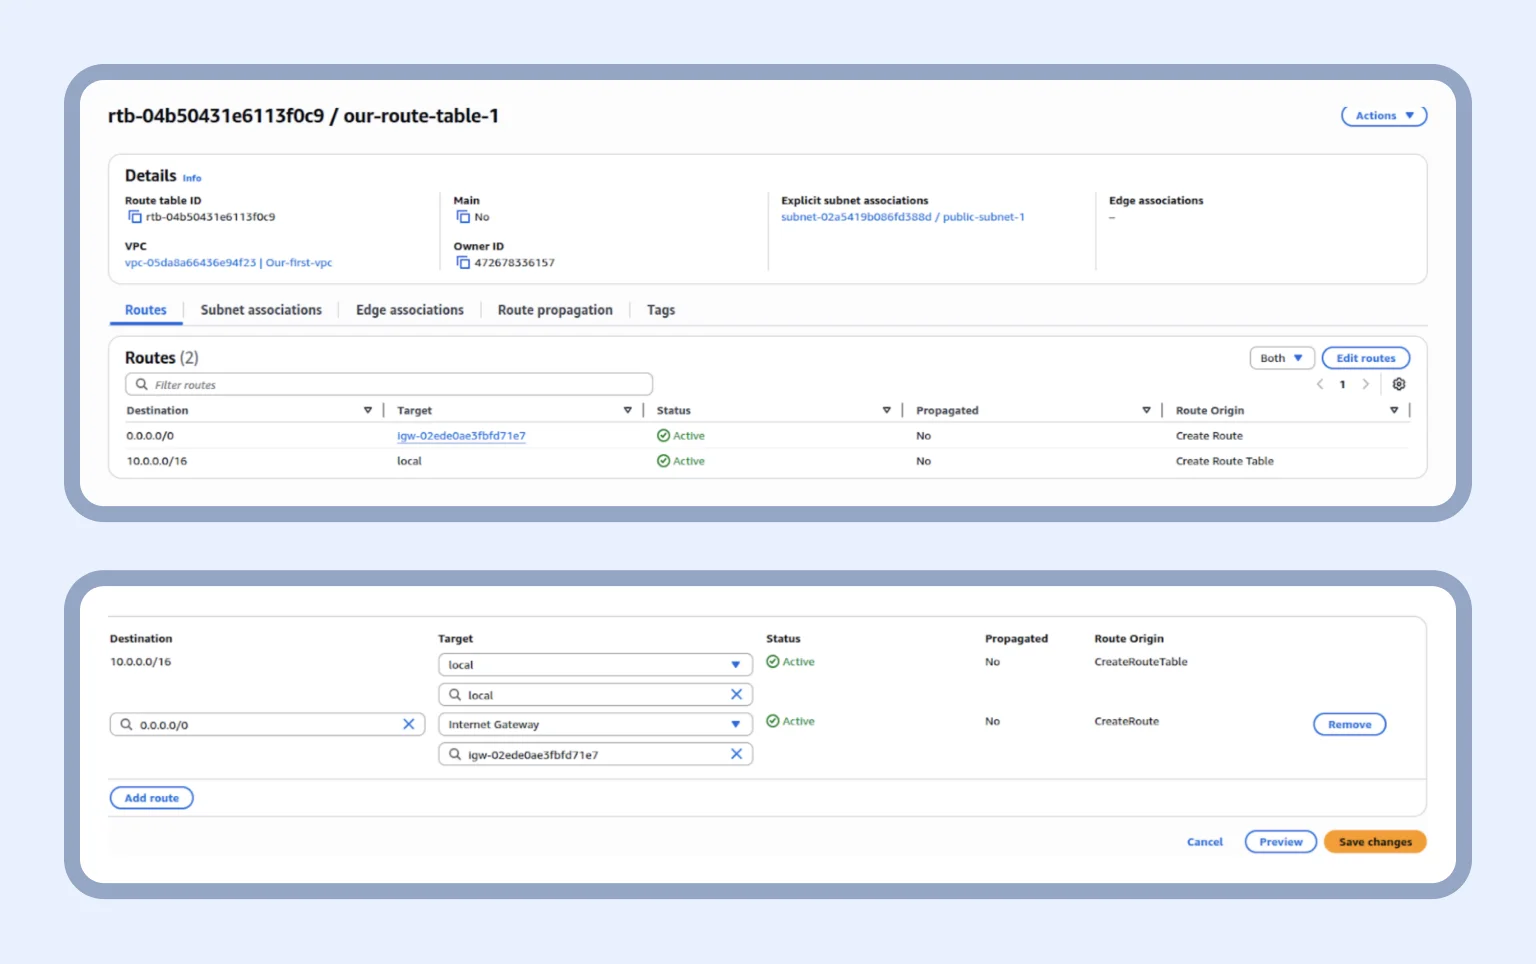
After this, every subnet that uses this route will have access to the Internet and vice versa. What’s next?
We should go into our public subnet and click on “Edit route table association.” Here, we select our route table and hit the orange Save button.
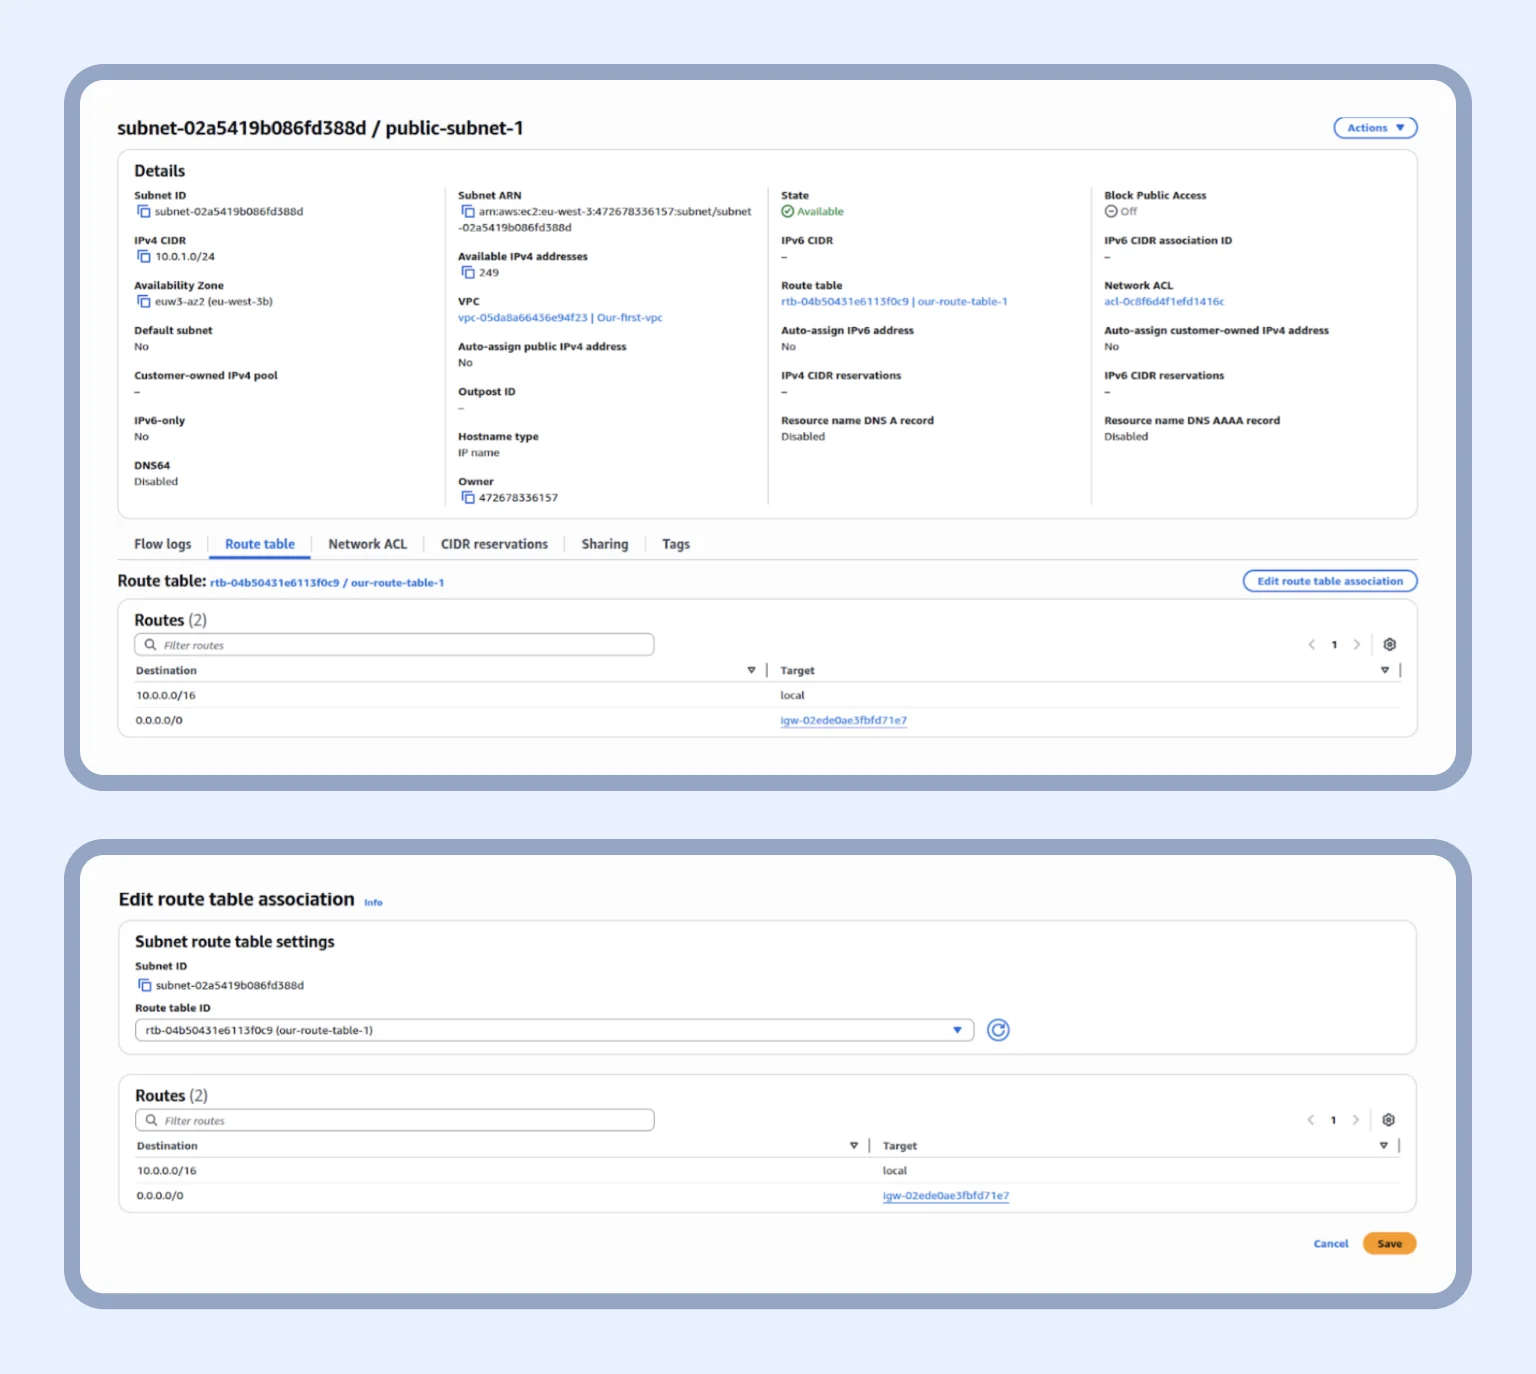
After all this work, we have access to the Internet through our services. If you encounter any issues with these four stages, we offer web development services to simplify your site deployment even further.
Modern web architecture that just works
The more time you spend deploying your site, the less time you have left to work on your app’s features. This simple truth calls for an easier solution — our architecture. Forget about slow releases since AppRunner secures fast deployment speed — no more manual server and container setup. RDS and ElastiCache simplify the maintenance — no more infrastructure administration. Finally, private databases and caches with restricted access via security groups, a VPC, and a VPC connector ensure security — no more manual firewall tinkering or risky configurations.
.webp)